3 Scan to File or USB
42 How to Perform Scan to File or USB
8
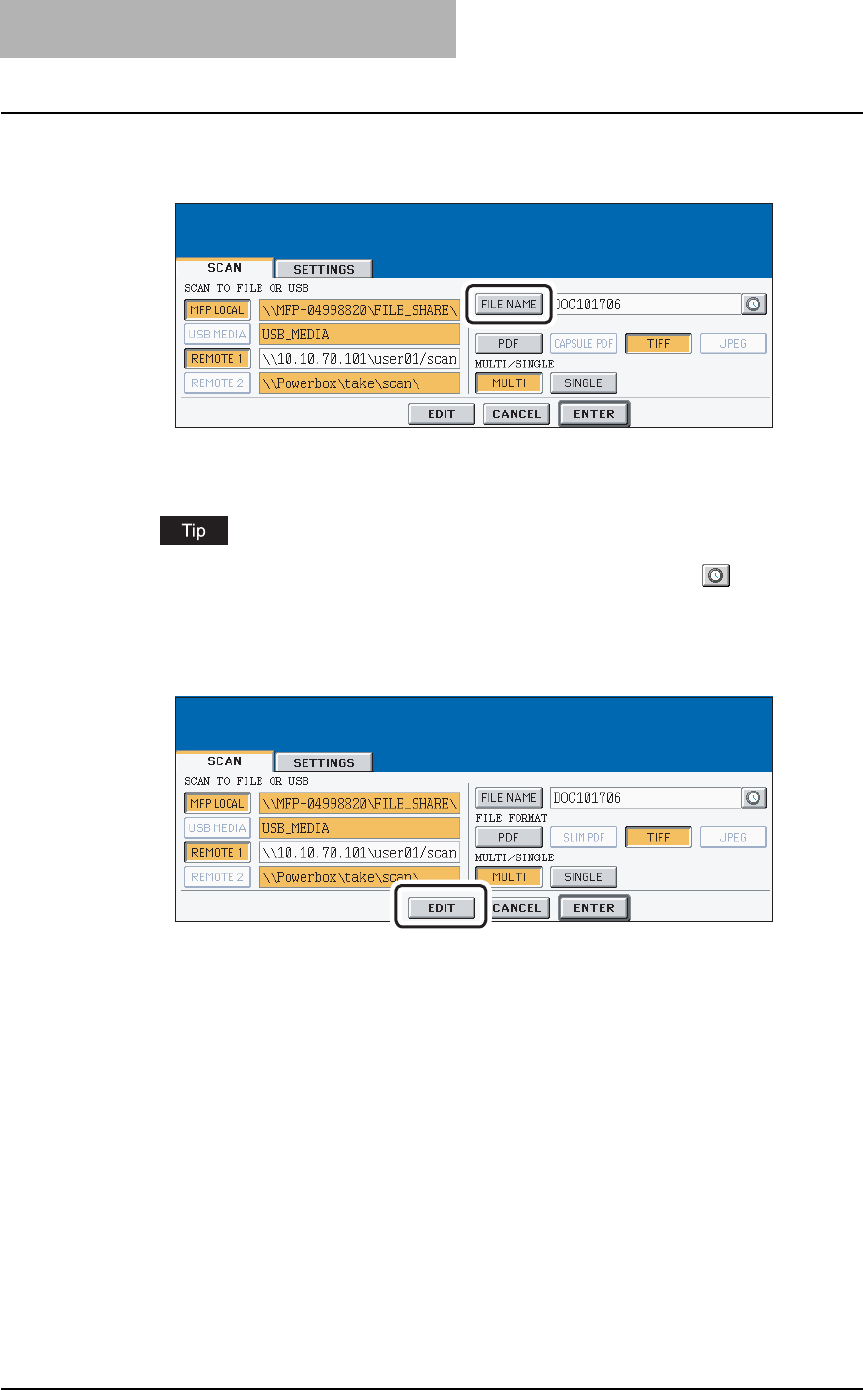
Press the [FILE NAME] button if you want rename the document
name of the scanned data.
y The letter entry screen is displayed. Enter the value using the keyboard and digital
keys, and press the [ENTER] button to set the entry.
When you want to add the date and time in the file name, press the button. The
number to indicate the date and time that the job is performed is added to the file name
displayed in the [FILE NAME] field.
9
Select the following items and press the [EDIT] button.
y FILE FORMAT
[PDF] — Press this to attach the scanned data as PDF file.
[SLIM PDF] — Press this to attach the scanned data as slim PDF file. Select this when
you give priority to minimizing the file size over quality of image. This can be set only
when [FULL COLOR] or [GRAY SCALE] is selected in the “COLOR MODE” option.
When no optional memory is installed, [SLIM PDF] will not apply for scanning more than
Letter or A4 size originals.
[TIFF] — Press this to attach the scanned data as TIFF file.
[JPEG] — Press this to attach the scanned data as a JPEG file. This can be set only
when [FULL COLOR] or [GRAY SCALE] is selected in the “COLOR MODE” option.
y MULTI/SINGLE
[MULTI] — Press this to attach the scanned data as a multiple page file. When scanning
several pages, this equipment will store all pages as one file.
[SINGLE] — Press this to attach the scanned data as a single file for each page. When
scanning several pages, this equipment will store each page separately as files.


