


e-STUDIO5520C/6520C/6530C © 2008 TOSHIBA TEC CORPORATION All rights reserved
2-51
2. Copier-specific Adjustments
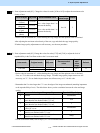
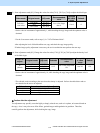
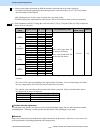
(3) Enter adjustment mode [05]. Change the values for codes [7811], [7812] or [7816] to adjust the black logos.
Color mode Original mode [05] code
Recommended
value
Accepta
ble value
range
Default
Text/Photo 05-7811
Text 05-7812
Full color /
Auto color
User custom 05-7816
Set a value larger
than 4.
0 to 8 0
* Set the value in increments of approximately 1, while checking the copy image until the optimum value is
obtained.
* For the User custom mode, refer to step (1) in "2.8 To Eliminate Moiré".
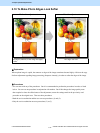
After adjusting the level of black headline text, copy and check the copy image quality.
If further image quality adjustment is necessary, the service technician must perform the next step.
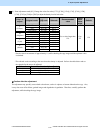
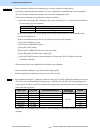
(4) Enter adjustment mode [05]. Change the values for codes [1794], [1795] or [7983] to adjust the density level
of the black logos.
Color to
adjust
Original mode [05] code Subcode
Recommended
value
Acceptabl
e value
range
Default
Text/Photo 05-1794
Text 05-1795
K
(Black)
User custom 05-7983
0/1/2
Set a value larger than
128.
0 to 255 128
* Set the value in increments of approximately 10, while checking the copy image until the optimum value is
obtained.
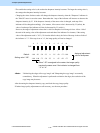
* The subcode varies according to the area where the density is adjusted. Refer to the table below and set
the subcode for the area to be adjusted.
Subcode Area where the density is adjusted
0 Low-density area
1 Medium-density area
2 High-density area
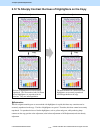
Caution after the adjustment
The adjustment may possibly cause the highly or deeply colored area, such as in a photo, to become blurred on
the copy. Also, it may also cause offset failure, grained images and degradation in gradation. Therefore,
carefully perform the adjustment, while checking the copy image.