


Chapter 2 Printer Installation
6
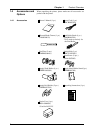
2. Printer Installation
This chapter describes in detail how to set up the printer to get ready
for printing.
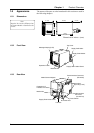
2.1 Installing the
Accessories
First install the accessories on the printer.
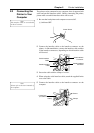
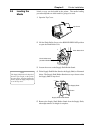
1
Unpack the Fan Filters.
2
Mount the Fan Filters over the Air Vents.
2.1.1 Fan Filters
Note:
Please clean the Filter Pads
periodically. See Section 5.1.3.
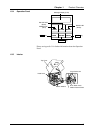
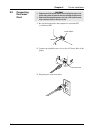
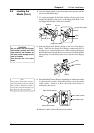
Attach the Media Slide with the two supplied black screws.
When loading a roll of labels, fit the Media Slide on the screw holes
above the Media Inlet.
or
When loading a roll of tags, fit the Media Slide on the screw holes
below the Media Inlet.
2.1.2 Media Slide
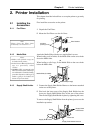
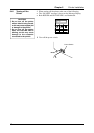
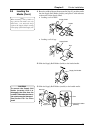
1
Connect the Supply Shaft Holder Harness to the harness attached
on the rear of the printer.
2
First hook the lower parts of the Supply Shaft Holder into the
lower two Supply Shaft Holder Slots on the rear of the printer.
Then fix the Supply Shaft Holder in place by tightening the screw.
To remove the Supply Shaft Holder from the printer, just reverse the
installation procedure.
2.1.3 Supply Shaft Holder
Filter Pad
Filter Retainer
Air Vents
(Cooling Fans)
Media Slide (for tags)
Media Slide (for labels)
Harness
Supply Shaft Holder Harness
Supply Shaft Holder
Screw
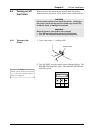
Notes:
• Either a roll of labels or tags can
be loaded in the printer.
• In this Owner's Manual, labels and
tags are generically called
"media".
• TOSHIBA TEC recommends that
labels are rolled outside, and the tags
are rolled inside. The media loading
procedure depends on which type of
media is going to be loaded. See
Section 2.5 for more detail.
Supply Shaft
Holder Slots