


Installation
2–26 975-0131-01-01
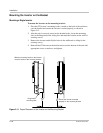
Installing the Heat Sink Cover
You may find it easier to install the heat sink cover before mounting the inverter.
If the inverter is already installed and in operation, it is best to perform the
following procedures after dark or on an overcast day when the unit is cool.
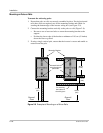
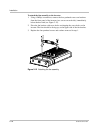
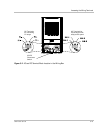
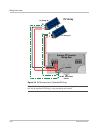
To install the heat sink cover on the inverter:
1. Hold the heat sink cover vertically in front of you with the curved edge
upward and the flanges bent away from you.
2. Insert the heat sink cover left side flange into the groove on the left side of the
inverter heat sink. It should snap into place.
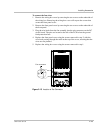
3. Push the cover so that it curves outward (away from the inverter) and insert
the right side flange into the groove on the right side of the inverter heat sink.
It should snap into place.
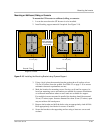
To remove the
heat sink cover from the inverter:
1. Press the right side of the heat sink cover inward (i.e., toward the left side) and
simultaneously lift it upwards to pull it out of the groove on the right side of
the inverter.
2. Pull the left side of the cover out of the inverter left side groove.
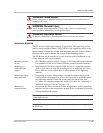
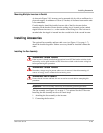
WARNING: Burn hazard
Ensure that the inverter and cover are not too hot to hold firmly before installing or
removing the heat sink cover.
Important:
You may start with the left or right side of the cover. This example starts
on the right side.