


Installation and Setup
Xerox
®
WorkCentre
®
4265 Multifunction Printer 39
User Guide
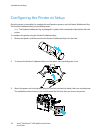
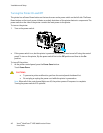
Physically Connecting the Printer to the Network
Use a Category 5 or better Ethernet cable to connect the printer to the network. An Ethernet network is
used for one or more computers and supports many printers and systems simultaneously. An Ethernet
connection provides direct access to printer settings using CentreWare Internet Services.
To connect the printer:
1. Connect the power cord to the printer, and plug the cord into an electrical outlet.
2. Connect one end of a Category 5 or better Ethernet cable to the Ethernet port on the printer.
Connect the other end of the Ethernet cable to a correctly configured network port on a hub or
router.
3. Turn on the printer.
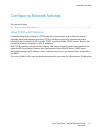
Note: For details on configuring wireless network settings, see the System Administrator Guide at
www.xerox.com/office/WC4265docs.
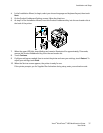
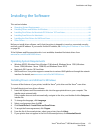
Connecting to a Computer Using USB
To connect using USB, you need Windows XP SP3, Windows 7, Windows 8 or later, Windows Server 2003
or later, or Macintosh OS X version 10.5 or later.
To connect the printer to the computer using a USB cable:
1. Connect the B end of a standard A/B USB 2.0 cable to the USB Port on the left side of the printer.
2. Connect the A end of the USB cable to the USB port on the computer.
3. If the Windows Found New Hardware Wizard appears, cancel it.
4. Install the print drivers. For details, see Installing the Software on page 43.
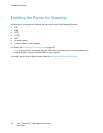
Connecting to a Telephone Line
Note: Not all options listed are supported on all printers. Some options apply only to a specific
printer model, configuration, operating system, or driver type.
1. Connect a standard RJ11 cable, No. 26 American Wire Gauge (AWG) or larger, to the Line port on
the back of the printer.
2. Connect the other end of the RJ11 cable to an operating telephone line.
3. Enable and configure the Fax functions.
For details, see the System Administrator Guide at www.xerox.com/office/WC4265docs.