E-6
How to install
■ Screen setting
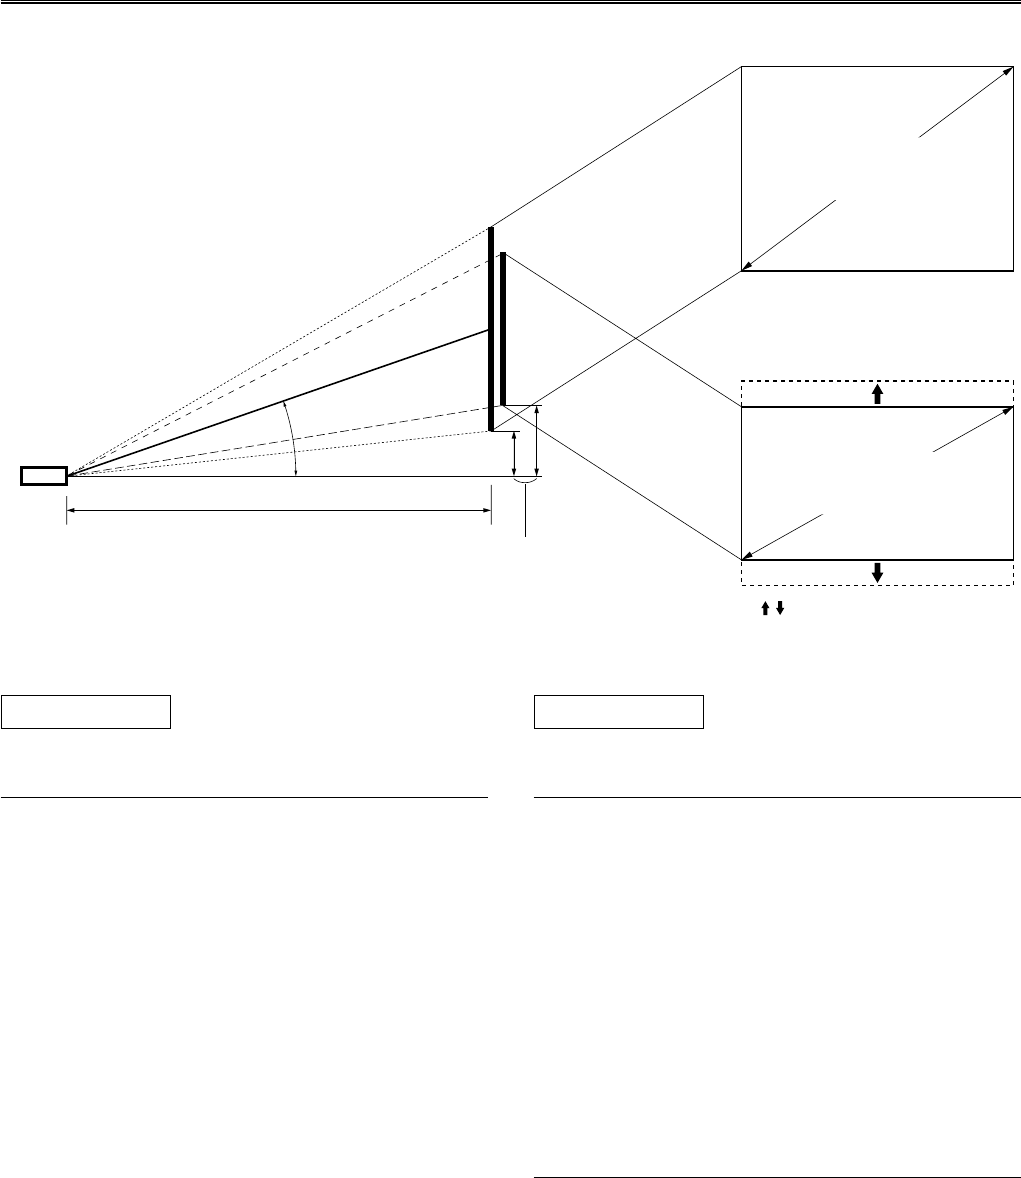
The screen height depends on your screen size. This unit projects
facing slightly upward, although projecting symmetrically about
the lens center on the horizontal axis. The following charts show
the height [H] from the lens center to the screen bottom. Consider
dimension [H] when determining the position to set your screen.
12°—15°
*
*
This unit
Center of image
Center of lens
Projection distance [L]
Height to the screen [H]
4:3 screen
Screen size
(diagonal)
16:9 screen
Screen size
(diagonal)
4:3 Screen
16:9 Screen
(When “DIGITAL LENS SHIFT” is set to 0)
Screen size
(inch)
60
80
100
120
150
200
(cm)
18
24
30
36
45
59
Screen size
(inch)
60
80
100
120
150
200
(cm)
32
42
53
64
80
106
Screen size
(inch)
60
80
100
120
150
200
(cm)
19—44
26—59
32—74
39—89
49—111
65—145
■ Adjusting with “DIGITAL LENS SHIFT”
When “SCREEN ASPECT” in the menu group 4 <SETUP> on
the menu is set to “16:9”, the projected image can be vertically
adjusted within the range shown on the right by digitally changing
[H] (the height from the lens center to the screen bottom). See page
17.
*
See “DIGITAL LENS SHIFT”
described in the next section on
page 18.
Height to the screen bottom [H]
(inch)
7-1/16
9-7/16
11-13/16
14-3/16
17-3/4
23-1/4
Height to the screen bottom [H]
(inch)
12-5/8
16-1/2
20-7/8
25-3/16
31-1/2
41-3/4
Height to the screen bottom [H]
(inch)
7-1/2—17-5/16
10-1/4—23-1/4
12-5/8—29-1/8
15-3/8—35
19-3/8—43-3/4
25-5/8—57
■ Setting “SCREEN ASPECT”
It is necessary to set the screen aspect ratio (4:3 or 16:9) depending on your screen in order to properly project images on the entire area of
the screen. When the 16:9 screen is used and “SCREEN ASPECT” is set to “16:9”, it is possible to project 4:3 video signals on the entire
screen without losing any part of the image off screen. It is also possible to adjust the projected image vertically as described in the next
section. See “SCREEN ASPECT” in the menu group 4 <SETUP> described on page 17.


