


E-7
English
INSTALLATION
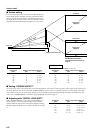
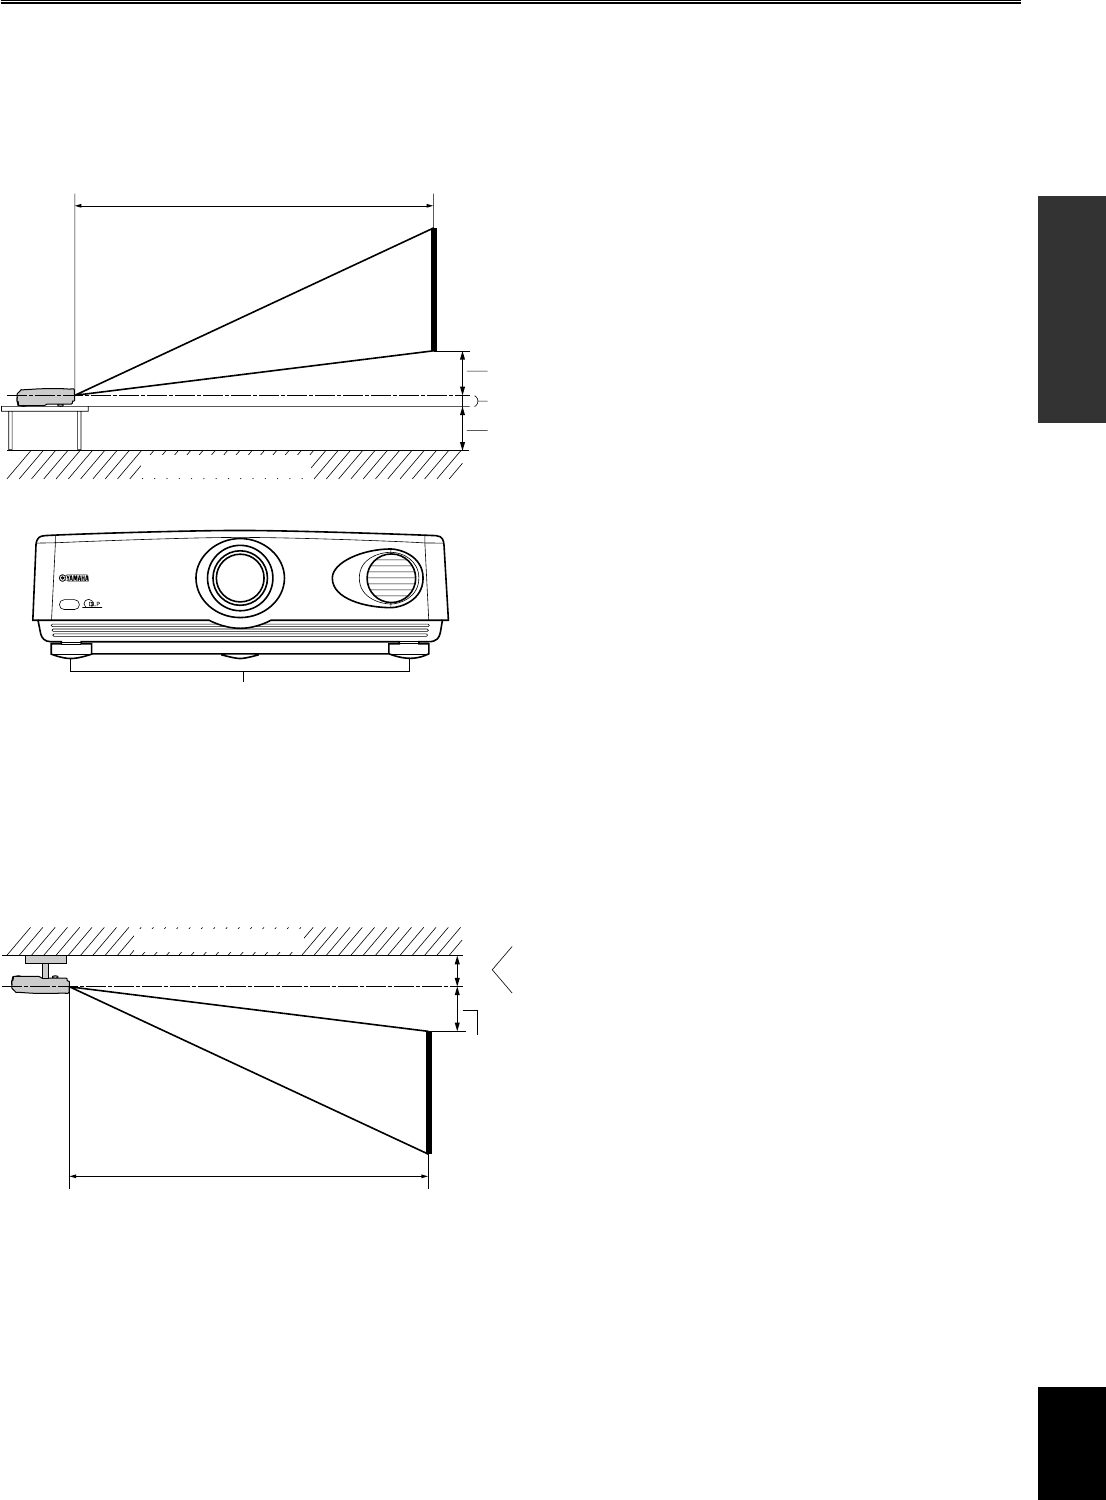
2. Mounting on the ceiling
A ceiling mount bracket (optional) is needed for mounting this unit on the ceiling. Consult with your local authorized dealer or any reliable
contractor to mount this unit on the ceiling.
The vertically reversed illustration of the screen installation position shown page 6 helps determine how far the screen should be set from the
ceiling. The height can be determined by adding [H] described on page 6 and the height of the ceiling mount bracket [C] as shown in the
following illustration. When this unit is installed on the ceiling, “FRONT/CEILING” in the menu group 4 <SETUP> must be selected on
the menu. (See page 17.) The projected image can be vertically adjusted within a certain range by changing the value in “DIGITAL LENS
SHIFT” on the menu when “SCREEN ASPECT” on the menu is set to “16:9”. See page 6 for details.
3. Rear projection
You can watch images projected on the back of a semi-translucent screen while sitting on the other side of the screen. The screen position can
be determined by simply following the front setting procedures described above. For this setting, “REAR/TABLE” or “REAR/CEILING”
must be selected for “INSTALLATION” in the menu group 4 <SETUP> on the menu. (See page 17.)
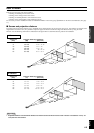
■ Installation methods
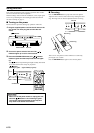
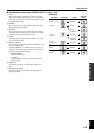
1. Installing on a tabletop
How to install
Low ceiling
S: 20 cm (8 inch)
High ceiling
L: 90 to 147 cm (3 to 5 feet)
(adjustable every 3 cm (1-3/16 inch))
Screen
Projection distance [L]
See page 5.
Ceiling
[H] See page 6.
Floor
Projection distance [L]
See page 5.
Screen
[H] See page 6.
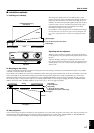
8 cm (3-1/8 inch) to the lens center
Table height
This unit projects images when set on a tabletop with a certain
height in front of the screen. The table height and [H] described on
page 6 must be determined first to decide on how high the screen
should be set for the best result. The height from this unit’s bottom
to the lens center is 8 cm (3-1/8 inch). The position of the screen
(the height from the floor to the screen bottom) can be easily
determined by adding these three figures.
For example, if you are setting this unit on a tabletop with a height
of 50 cm (20 inch), you need to set your screen at a height of <50
cm + 8 cm + [H] cm (20 inch + 3-1/8 inch + [H] inch)> from the
floor.
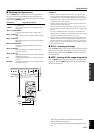
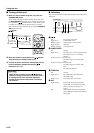
Adjusters
Adjusting with the adjusters
When this unit is installed on a tabletop, the position of the image
can be adjusted by using the adjusters located at the bottom front of
this unit.
Adjust the height by rotating the movable part of the two screw-
type adjusters at the front bottom of this unit. The adjustment range
of these adjusters is 2.5 cm (1 inch). If loosened completely, they
will come off.
[C]