


E-19
English
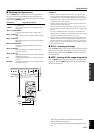
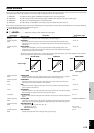
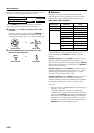
MENU
Menu operation
AUTO
ESCAPE
SELECT
ASPECT
RESET STILL HIDE
INPUT
MENU
PATT
PATTERN
STANDBY/ON
5
3, 5
4
1, 6
2, 4
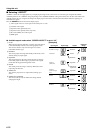
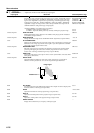
STANDBY
/
ON
PATTERN MENU
INPUT
LAMP
/
COVER
TEMP
/
FAN
24P
ESCAPE
SELECT
2, 4
5 3, 51, 6
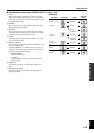
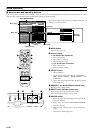
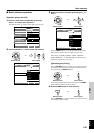
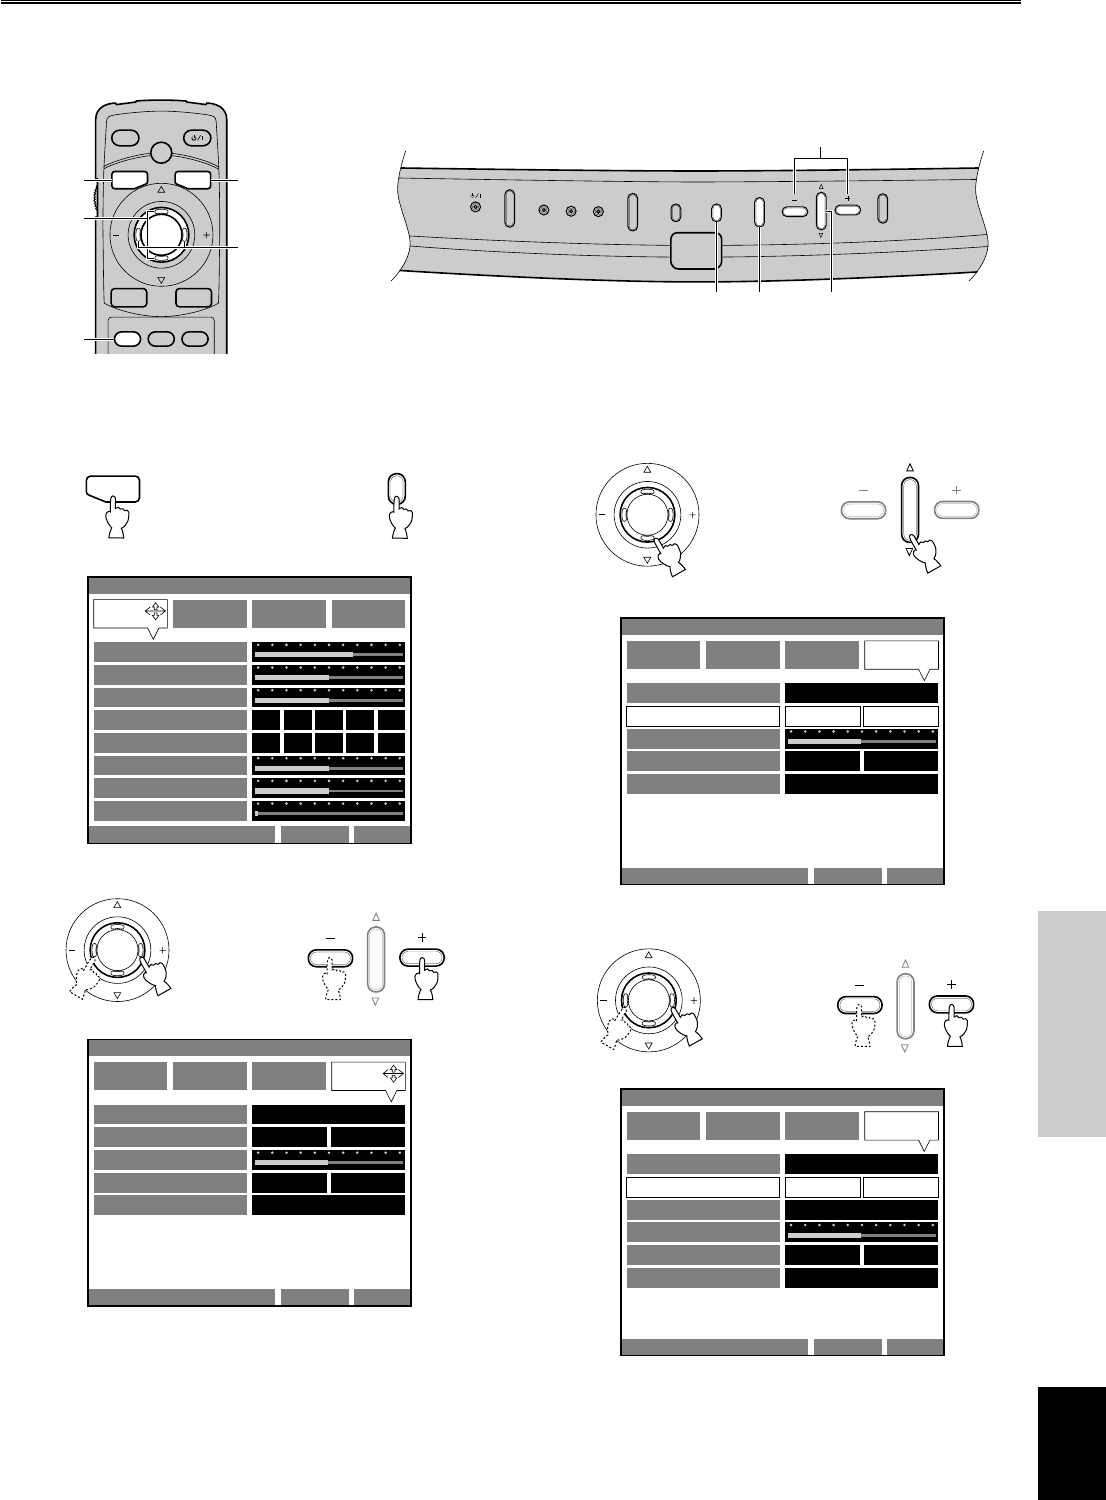
■ Basic menu operation
To ensure proper projection, start with setting and adjustment for the menu group “SETUP”.
1. Press the MENU button to open the menu.
The previous menu screen opens if menu operation has already
been performed.
2. Press the + or – button to select a menu group.
MENU
MENU
Remote control
or
Control panel
MOVE MENU WINDOW
IMAGE SIGNAL INITIAL SETUP
BLACK LEVEL 0
CONTRAST 0
BRIGHTNESS 0
HUE 0
SATURATION
COLOR BOOST
GAMMA TRIM
MEMORY1 VIDEO
A B C D E
1 2 3 4 5SHARPNESS
0
0
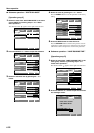
MOVE MENU WINDOW
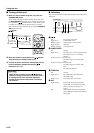
IMAGE SIGNAL INITIAL SETUP
INSTALLATION FRONT/TABLE
FRONT&REAR
SCREEN ASPECT
KEYSTONE 0
KEYSTONE MODE
R/C SENSOR
4:3 16:9
NORMAL FULL
MEMORY1 VIDEO
SELECT
Remote control
or
Control panel
3. Press the g button to enter the menu item hierarchy.
Then select an item to be adjusted by pressing the h or g
button.
4. Select or change the parameter by pressing the + or –
button.
SELECT
IMAGE SIGNAL INITIAL SETUP
INSTALLATION FRONT/TABLE
FRONT&REAR
SCREEN ASPECT
KEYSTONE 0
KEYSTONE MODE
R/C SENSOR
4:3 16:9
NORMAL FULL
MEMORY1 VIDEO
Remote control
or
Control panel
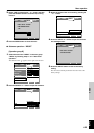
IMAGE SIGNAL INITIAL SETUP
INSTALLATION FRONT/TABLE
FRONT&REAR
SCREEN ASPECT
KEYSTONE 0
KEYSTONE MODE
R/C SENSOR
DIGITAL LENS SHIFT
4:3 16:9
NORMAL FULL
MEMORY1 VIDEO
SELECT
Remote control
or
Control panel