97
Troubleshooting
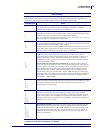
Feed Button Modes
8/4/10 GX420d™ / GX430d™ User Guide 980611-001 Rev. C
Power On Modes
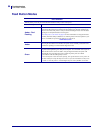
With the printer power on and top cover closed, press and hold the Feed button for several seconds. The green status
LED will flash a number of times in sequence. The explanation at the right (Action) shows what happens when you
release the key after the start specific number of flashes and before the next flash sequence starts.
Flash Sequence Action
*
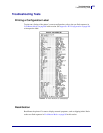
Configuration Status - Prints a detailed printer configuration status label. The label can be used
to verify printing, assist printer to computer communication configuration, maintenance,
troubleshooting, and help us with customer care communications.
*
**
Standard Auto Media Calibration - The printer detects and sets media type and media length,
and it adjusts the media sensors for optimal performance with the installed media (equivalent ZPL
command ~JC). The printer will feed one to four labels while calibrating.
Note: Users familiar with the Zebra EPL desktop printer use this Feed mode to replace power-up
AutoSensing calibration (equivalent EPL command XA).
*
**
***
Serial Port Configuration - Applies only to printers with serial interface ports.
To reset the serial port communication parameters, except for Flow Control. Press and release the
Feed button while the LED rapidly flashes amber and green.
For autobaud synchronization: Send the ^XA^XZ command sequence to the printer while the LED
rapidly flashes amber and green. When the printer and host are synchronized, the LED changes to
solid green. NOTE: No labels will print during autobaud synchronization.
*
**
***
****
Factory Defaults - Resets the printer to the factory default settings (equivalent to ZPL command
^JUN). See Appendix: ZPL Configuration on page109 for a description of the primary
configuration settings and their associated ZPL commands. Some configuration settings are not
returned to their initial ‘out of box’ settings. Other settings are exclusively set, viewed and
controlled by programming are also reset. The performs a standard media calibration and then.a
memory defragmentation routine.
Once the printer has entered the Factory Default mode, the status light will turn amber for
three (3) seconds. During that time you may do two things: Do nothing and the printer will reset
the factory defaults automatically as described above OR press and hold the feed button to enter a
factory default reset modes for printers with a network (Ethernet, Wi-Fi or Bluetooth) printer
option (equivalent ZPL command ^JUF). Releasing the button after the first flash resets the
network factory options only (equivalent ZPL command ^JUN). Releasing the button after the
second flash sequence (two flashes) will reset the printer defaults only. Releasing the button after
the third flash sequence (three flashes) will reset both printer and network settings (equivalent
ZPL commands ^JUN and ^JUF)
*
**
***
****
*****
Print Width Adjustment - Prints a succession of boxes starting at the minimum print width and
ending in the printer’s maximum print width in 4mm increments. Press the Feed button once when
the printer has reached the desired maximum print width. Note that the printer driver and
applications can override this setting.
*
**
***
****
*****
******
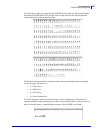
Print Darkness (Density) Adjustment - Prints a succession of bar code simulation patterns
starting at the minimum darkness (print density/heat) and ending in the printer’s maximum
darkness in increments of four (4) using the ZPL darkness setting range values. Press the Feed
button once the pattern is clear and legible. Do not continue to increase the darkness setting or
bar code line widths may become distorted reducing readability. Note that the printer driver and
applications can override this setting.
*
**
***
****
*****
******
*******
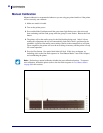
Manual Media Calibration - The printer runs extensive tests to detect and set media type and
media length, and then it adjusts the media sensors for optimal performance with the installed
media (equivalent ZPL command ~JG). Manual calibration is recommended whenever you are
using pre-printed media, print on the liner or if the printer will not correctly auto calibrate. A
graphical profile of the media sensing will print. See Manual Calibration on page 92 for more
details and considerations.
If the Feed button remains pressed after 7th flash sequence cycle finishes, the printer exits the
configuration mode when the Feed button is released.


