


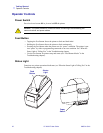


Getting Started
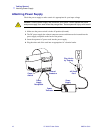
Hooking Up the Printer and Computer
980531-001 A LP 2824-Z User Guide 25
Ethernet Interface Requirements
Ethernet provides a powerful networking capability that can be of use in a variety of internet/
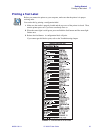
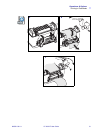
intranet printing solutions. After you load media and close the top cover, you can press the test
button next to the connector on the rear of the printer to get an ethernet configuration label.
Serial Interface Requirements
The standard cable must have a nine-pin “D” type (DB-9P) male connector on one end, which
is plugged into the mating (DB-9S) serial port located on the back of the printer.
There is an optional serial interface that uses a 6-pin RJ-11 male connector on one end, which
is plugged into the mating RJ-11 alternative serial port located on the back of the printer.
The other end of the signal interface cable connects to a serial port at the host computer.
Depending on the specific interface requirements, this will most likely be a straight-through
cable.
For pinout information, refer to Serial (RS-232) Connector on page 58.
Communicating with the Printer
Universal Serial Bus (USB) Communications
The printer is a terminal device when using a universal serial bus interface. You can refer to
the Universal Serial Bus Specification for details regarding this interface.
Parallel Communications
When using the parallel port, typically there is no setup is required once the cable is plugged
in. If you should encounter any problems, consult the user’s guide that came with your
computer.
Internal ZebraNet® PrintServer II™ Ethernet Communications
You can refer to the ZebraNet® PrintServer II™ for Ethernet Networks Installation and
Operation Guide for details regarding this interface.
Serial Communications
Serial communications between the printer and the host computer can be set by either
autobaud synchronization or the
^SC command.
Autobaud
Autobaud synchronization allows the printer to automatically match the communication
parameters of the host computer. To autobaud:
1. Press and hold the feed button until the green status LED flashes once, twice, and then
three times.
2. While the status LED flashes, send a ZPL II format to the printer.