


QL 320 User’s Guide 9
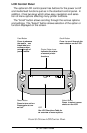
Getting Ready to Print
Battery
Installing the Battery
NOTE: Batteries are shipped uncharged. Remove protective shrink-
wrap and labels from new battery packs prior to use.
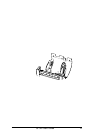
1. If the printer is so equipped, rotate the Belt Clip to allow ac-
cess to the Battery compartment.
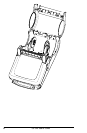
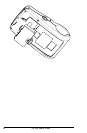
2. Insert the battery into the printer as shown in Figure 2,
3. Rock the Battery into the printer as shown until it locks in
place.
When the battery is first installed, the Control Panel indicators
may briefly turn on and then go off which indicates the battery is
not fully charged (see “Charging the Battery” below and “Operator
Controls”).
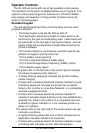
Charging the Battery
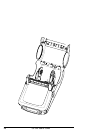
Refer to Figure 3. Your battery charger may look slightly differ-
ent from the ones illustrated.
If you are using the LI 72 battery charger:
1. Install the battery in the printer and plug the Charger into
the appropriate A.C. wall receptacle. Then insert the
charge cable into the battery charger jack.
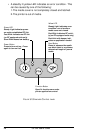
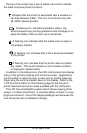
2. The charger LED will indicate the status of the charger as
follows:
• A steady light indicates the battery is undergoing a fast
charge.
•A slow blinking light indicates the charger is in trickle mode.
The battery is ready for use.
•A rapidly blinking light indicates a problem with the battery.
The battery may have an internal short, or its charge moni-
toring circuitry may be malfunctioning. The battery should
not be used any further.
• Battery Packs may be charged either when installed in the
printer or when removed.
Do not attempt to charge batteries with the LI 72
while printing. Attempting to print while charging can
result in improperly charged batteries.