


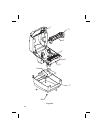


Installing the Printhead
1. Ensure that the printer is turned off and unplugged.
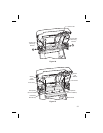
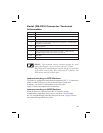
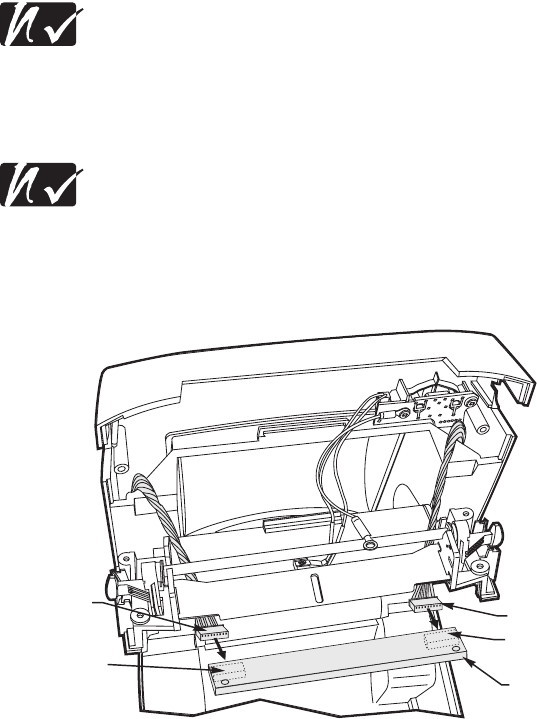
2. Refer to Figure 28. Route the two printhead wire harness connectors as
shown. Then, insert the connectors into their receptacles.
3. Insert the printhead into the printhead bracket.
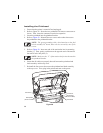
4.RefertoFigure29.Reinstallthetwoscrewsandwashersthatsecure
the printhead to the printhead bracket.
NOTE: The green grounding cable, which attaches to the feed
switch assembly PC board, must also be secured by one of the
screws.
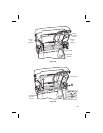
5.RefertoFigure30.Insertoneendofthetensionbarintoitsmounting
bracket (1). Then, gently push down on the opposite end of the tension
bar until it locks into place (2).
NOTE: Make sure the “V” of the tension bar fits into the notch in
the printhead bracket.
6. Insure that all cables are properly dressed between the printhead and
latch assembly and the top cover.
7. Reinstall the four screws that secure the printhead and latch assembly
to the top cover. Then, plug in the printer and turn on the power.
38
Printhead
Connector
Connector
Receptacle
(shown hidden)
Receptacle
(shown hidden)
Figure 28