Moving to a desired
point in a song (Locate
function)
You can specify a location within the song in
time units (minutes/seconds/milliseconds),
and move to that location.
1.
While the main screen is shown,
press the right [PARAMETER/
VALUE] key once.
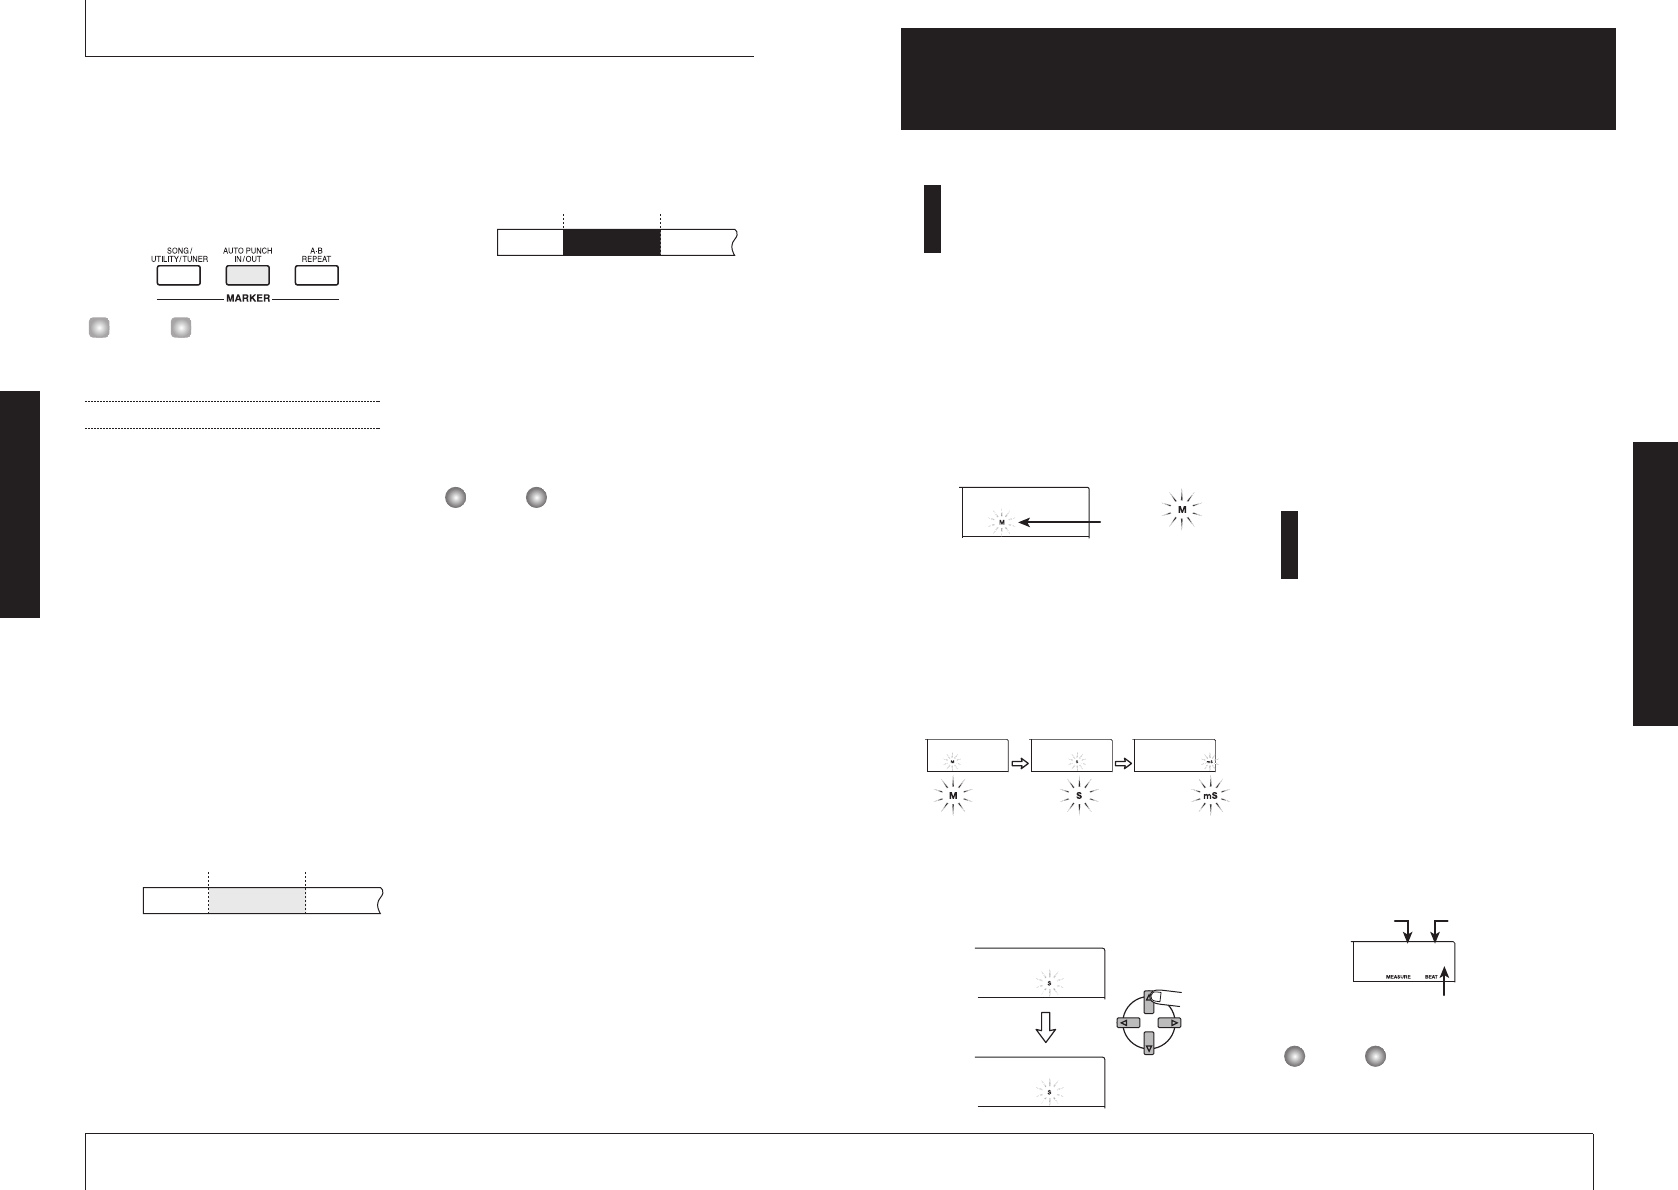
The indication "M" flashes on the display.
2.
Use the left/right [PARAMETER/
VALUE] keys to move the flashing
indication.
To show the current position in minutes, "M"
should be flashing. For indication in seconds,
"S" should be flashing. For indication in
milliseconds, "mS" should be flashing.
3.
Use the up/down [PARAMETER/
VALUE] keys to change the
numerical indication for the
currently selected unit.
While holding down the key for one
direction, pressing the key for the other
direction will cause a rapid change.
When the numbers have been changed, the
unit is at the corresponding song position.
Pressing the PLAY [
R
] key will start
playback from that point.
4.
To return to the main screen,
repeatedly press the left
[PARAMETER/VALUE] key until the
flashing stops.
Switching between time
and measure indication
The current point can be shown on the
display either as time or in measures.
1.
While the main screen is shown,
press the left/right [PARAMETER/
VALUE] keys repeatedly until the
measure and beat indication is
shown on the display.
The display switches to measure indication
(measure number/beat count). When the
transport keys are used in this condition to
move in the song, the measure number/beat
count indication changes accordingly.
• The measure number and beat count shown
here have been converted using the
NOTE
Measure
Beat
If the measure indication and time indication
do not match, this symbol is shown.
5-1O
0145966
0146966
0145965 0145965 0145965
0145965
Flashing
Reference [Locating a Point]
ZOOM MRS-4
33
5.
Move to the point at which you want
to punch-out, and press the [AUTO
PUNCH IN/OUT] button once more.
This sets the "Out point" at which recording will
end. The [AUTO PUNCH IN/OUT] button
changes from flashing to constantly lit.
The In/Out points can also be set while the
recorder is operating.
Carrying out auto punch-in/out
6.
Move to a point several measures
earlier than the In point.
7.
Repeatedly press the status key of
the track on which you want to
punch-in/out, until the key is
flashing in red.
8.
If you want to rehearse the auto
punch-in/out, press only the PLAY
[
R
] key. To actually carry out auto
punch-in/out, hold down the REC
[
O
] key while pressing the PLAY
[
R
] key.
●
If only PLAY [R] key was pushed
(rehearsal)
When the In point is reached, the track on
which you are punching-in/out will be muted.
When you reach the Out point, muting will
be defeated. (You will always be able to
monitor the input signal during this time.)
Performing this action will not record
anything on the track.
●
If REC [O] key + PLAY [R] key were
pushed (actual operation)
When the In point is reached, recording will
begin automatically (punch-in). When the
Out point is reached, recording will end
automatically, and playback will resume
(punch-out).
9.
When punch-in/out is complete,
press the STOP [
P
] key.
The display briefly shows "WAIT".
The length of the "WAIT" interval depends on
setting conditions.
10.
To listen to the recorded result,
press the status key for the track
on which you performed punch-
in/out until the key is lit in green.
Then move to a location earlier
than the In point and press the
PLAY [
R
] key.
If you want to re-do the recording, repeat
steps 6 – 9.
11.
When the results are as desired,
press the [AUTO PUNCH IN/OUT]
key so that the key goes out.
The auto punch-in/out function is turned off,
and the In point and Out point settings are
discarded.
NOTE
Track
Playback Playback
Record
In point Out point
Track
Playback Playback
Mute
In point Out point
HINT
ZOOM MRS-4
Reference [Recorder]
32
Reference [Locating a Point]
This section describes how to quickly move to any desired point in a song.


