ZOOM MRS-4
17
5.
When your guitar play is finished, press the STOP [
P
] key.
The REC [
O
] key and PLAY [
R
] key go out, and the recorder section stops. The display
briefly shows "WAIT", and then the main screen reappears.
The length of the "WAIT" interval differs, depending on recording conditions.
6.
To listen to the recording, use the ZERO [
U
] key to return to the beginning of the
song, and then press the PLAY [
R
] key.
The recorded track is played back.
•To turn the metronome off while checking the recording, press the [METRONOME] key
so that the key is no longer lit.
• While the recorder is stopped, you can use the REW [
T
] key and FF [
Y
] key to move
the current position in 0.1 second units. If you then press the PLAY [
R
] key, playback
starts from that position.
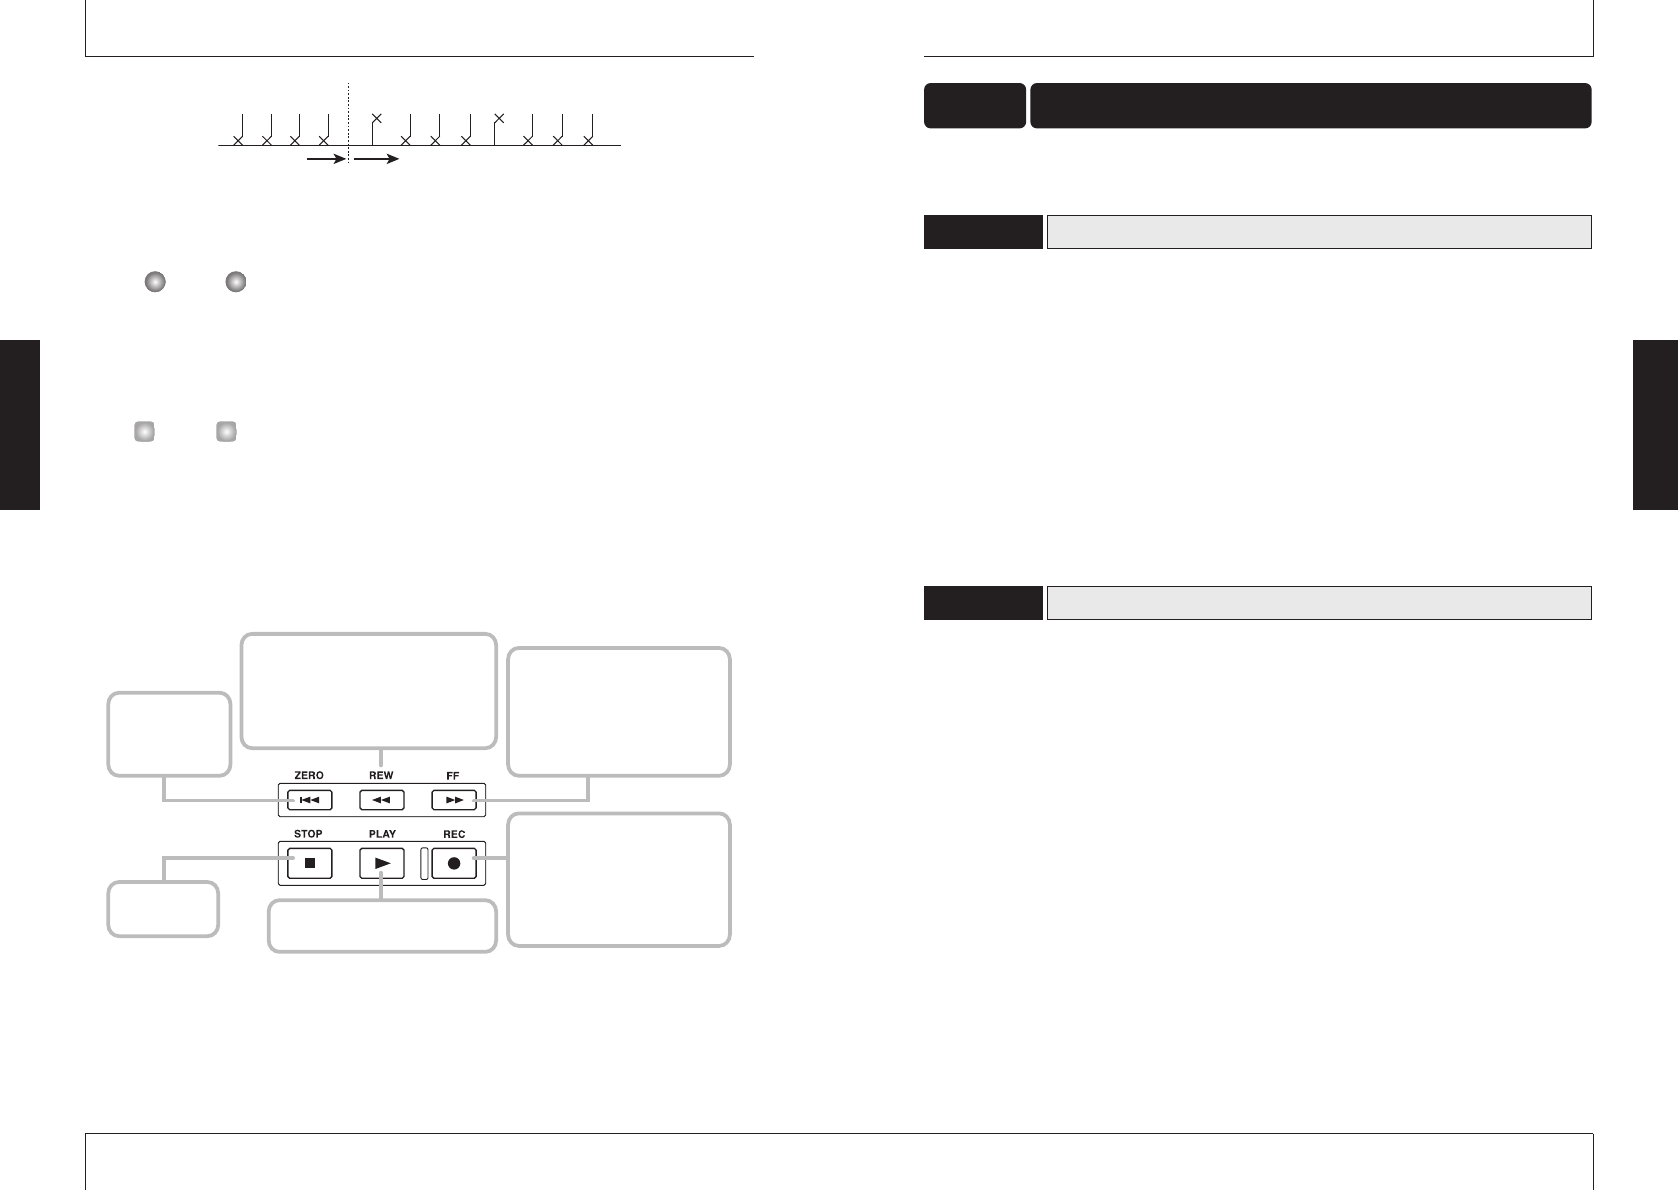
• The basic functions of the transport keys are explained below.
Basic functions of transport keys
7.
To stop playback, press the STOP [
P
] key.
To redo the recording, repeat steps 4 – 5.
8.
Press the status key 1 so that the key is lit in green.
The recording condition of track 1 is turned off.
ZERO [U] key
Moves to the start
of the song (counter
zero position).
STOP [P] key
Stops the song.
FF [Y] key
Moves forward from the current
position in 0.1 second steps. Keeping
the key depressed moves forward
quickly. Pressing the REW [T] key
while holding down the FF [Y] key
moves forward in 1 second steps.
REW [T] key
Moves backwards from the current position
in 0.1 second steps. Keeping the key
depressed moves back quickly. Pressing the
FF [Y] key while holding down the REW
[T] key moves backwards in 1 second steps.
REC [O] key
When this key is held down while
pressing the PLAY [R] key, the
recorder starts to record. Pressing this
key during playback causes punch-in,
and pressing the key during recording
causes punch-out.
PLAY [R] key
Starts playback from the current position.
Click ClickClick Click Ding Tick Tick Tick Ding Tick Tick Tick
RecordPrecount
ZOOM MRS-4
16
This section describes how to record another instrument on track 2 while listening to the guitar
recorded in step 2 (track 1).
1.
Connect the instrument or mic to the [INPUT 1] jack.
2.
Press the [ON/OFF] key 1 so that the key lights up.
3.
While playing the instrument, use the [INPUT LEVEL] control 1 to adjust the input
sensitivity.
4.
Press the [MIXDOWN] key and the [SEND/RETURN] key simultaneously, so that
the keys are flashing in red.
5.
Select the algorithm and set the value as was done in step 2.
6.
Press the [EXIT/NO] key to return to the main screen.
Record the sound of the second instrument on track 2.
1.
Press the status key 2 repeatedly, until the key is lit in red. Make sure that status
key 1 is lit in green.
This places track 2 into the recording standby condition.
2.
Operate fader 2 to adjust the monitor level.
If necessary, perform playback and adjust faders 1 and 2 for optimum balance between track
playback sound and input signal.
3.
To use the metronome function, press the [METRONOME] key so that the key
lights up.
4.
To start recording, use the ZERO [
U
] key to return to the beginning of the song,
and then press the PLAY [
R
] key while holding down the REC [
O
] key.
The precount clicks are heard, and then recording starts. The REC [
O
] key and PLAY [
R
]
key are lit. Play your guitar while listening to the playback sound of track 1 and the
metronome.
5.
When recording is finished, press the STOP [
P
] key.
The display briefly shows "WAIT", and then the main screen reappears.
Selecting a track and recording on it
3-2
Adjusting input sensitivity and setting the insert effect
3-1
Overdubbing Step 3
Basic Operation
Basic Operation
