20 CHAPTER 5: SOFTWARE INSTALLATION
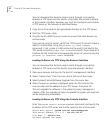
If the newly purchased SFMM is
loaded with software Release 1.1:
1 DO NOT insert the new SFMM into slot M2 yet.
2 With the chassis running, upgrade the existing single SFMM with
software Release 1.1 as described in “Downloading to an SFMM,” page 21.
3 After you have successfully upgraded the primary SFMM, insert the new
SFMM into slot M2.
4 The system will synchronize all configuration information from the SFMM
in slot M1 to the new SFMM in slot M2, displaying the following messages:
“Starts to sync all of the EE data to backup agent, EE Version = 0004
Number of EE sections to be synced = xx
EE Synchronization is completed, total xx sections are synced”
5 The secondary SFMM is now functioning.
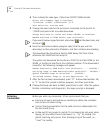
If you have an earlier SFMM that is
loaded with software Release 1.01:
The following procedure will take approximately 30 minutes to complete,
during which time all network connections to the chassis will be down.
1 With the chassis running, upgrade the existing single SFMM with
software Release 1.1 as described in “Downloading to an SFMM,” page 21.
2 After you have successfully upgraded the primary SFMM, power down
the chassis.
3 Remove the primary SFMM from the chassis.
4 Insert the newly purchased SFMM into slot M1.
5 Power up the chassis.
6 When the system comes up, assign an IP address to the SFMM using the
protocol/ip/basicConfig command. (This address is required to upgrade
the SFMM’s software revision via TFTP.) Then upgrade this SFMM with
software Release 1.1 as described in “Downloading to an SFMM,” on
page 21.
7 After you have successfully upgraded the new SFMM, power down the
chassis.
8 Remove the new SFMM from the chassis.
9 Re-insert the primary SFMM that was removed from the chassis in Step 3
into slot M1. DO NOT insert the other SFMM into slot M2 yet.
10 Power up the chassis.


