


Quick Installation Guide 7
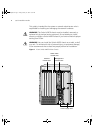
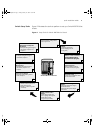
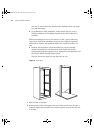
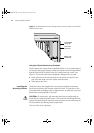
Figure 5 The Switch 4007R 8-slot Chassis is Shipped with These Slots Empty
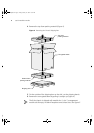
After you receive the chassis, remove the faceplate from power supply
slot 3 to help make chassis installation easier. See step 8 in this section.
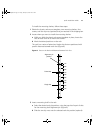
7 While the 8-slot chassis is still in the base of the shipping box, have one
person grasp the chassis and tilt the chassis backward.
8 To make chassis installation easier, remove another blank faceplate from a
power supply slot.While the 8-slot chassis is in this position, and using a
flat-blade screwdriver, remove the blank faceplate from power supply slot
3 only.
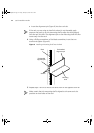
9 Using two people, lift the Switch 4007R 8-slot chassis out of the shipping
box base and place the chassis on the floor in front of the rack, table, or
ON
R
Switch
4007
1234567 8 910
Power supply slots
Switch fabric
module slot 7
Interface
module
slot 1
Management
module slot 9
4007RQS.book Page 7 Friday, January 25, 2002 10:27 AM