


14
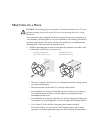
CONNECTING THE STANDARD ANTENNAS
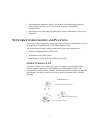
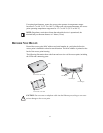
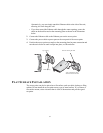
The Access Point 7250 is supplied with standard detachable antennas. These should be
attached before the access point is installed. If using alternate antennas, see “Selecting
and Connecting a Different Antenna Model” on page 20.
1 Carefully unpack the standard detachable antennas.
2 Screw an antenna into each of the sockets in the access point housing.
3 Hand-tighten the antennas at the very base of the SMA connectors without
handling the antenna tips.
4 Position the antennas so they turn out and away from the access point at a
45-degree angle. After network startup, you may need to adjust the antennas to
fine-tune coverage in your area.
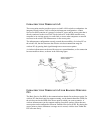
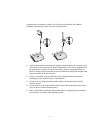
Depending on the coverage required for your site, you may want to replace the
standard detachable antennas with one of the external antennas available for use
with the access point. See “Selecting and Connecting a Different Antenna Model”
on page 20.
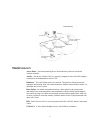
CONNECTING POWER
It is advisable to connect the power and check the Ethernet cables and LEDs before
installing the unit in a hard-to-reach location.
The access point complies with the IEEE 802.3af Power-over-Ethernet standard. It
receives power over a standard category 5 straight (8-wire) Ethernet cable.
CAUTION: Do not handle the antenna tips, especially after they are connected to the
access point, as this could lead to electrostatic discharge (ESD), which could damage
the equipment.
!