


User Guide for AIR-104/AIR-204 4-11
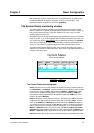
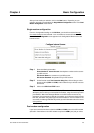
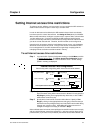
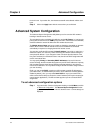
Step 4 Enter the following information for the second Internet account:
Phone Number for 2nd Internet Account:
the telephone number used to
access this ISP account.
2nd Internet Account Name:
the username of this ISP account.
2nd Internet Account Password:
the password of this ISP account.
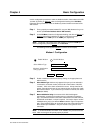
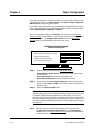
Step 5 On the line that reads
Test Connection Using Port
, click and drag to select
the port number (
COM1
or
COM2
) of the modem to which you intend to
test
this ISP account.
Step 6 Click
APPLY and TEST
.
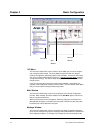
Note: When you click
APPLY and TEST
, the AIR-104/204 will immediately
attempt to place a call to your Internet Service Provider, using the modem you have
just identified. Watch the Message Window on the ICC browser screen for any
messages. If the connection is opened successfully, your LAN users should re-boot
their PCs, after which they may begin to access the Internet. If the connection is not
successful, the Message Window will provide you with information about the nature
of the problem.
After successful configuration, what next?
After the ISP account(s) specified by your configuration has been opened successfully, all
the users on your LAN may begin accessing the Internet immediately. However, each PC
that wishes to communicate with the Internet must be configured to obtain an IP address
from the AIR-104/204 automatically. The procedure to configure network PC’s is
described fully in
Chapter 3
.
Additionally, every time that the AIR-104/204 opens a new ISP connection, there is a
possibility that the DNS information provided by the ISP may have changed (for more
information, see the section entitled
Advanced System Configuration
in
Chapter 5
). If this
occurs, users on the LAN may need to reboot their computers in order to access the
Internet successfully.
Happy surfing!
Phone Number for 2nd Internet Account
2nd Internet Account Name
2nd Internet Account Password
Configure Internet Access
APPLY and TEST CANCEL
Test connection using port
1
Second Internet Account
Chapter 4 Basic Configuration