


3 System upgrade
34
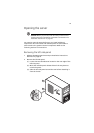
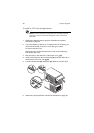
5 Place the HSFD assembly upside down on a flat surface.
Note: Wipe off the thermal grease from both the HSFD assembly
and CPU using an alcohol pad.
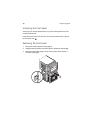
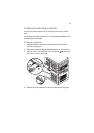
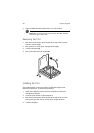
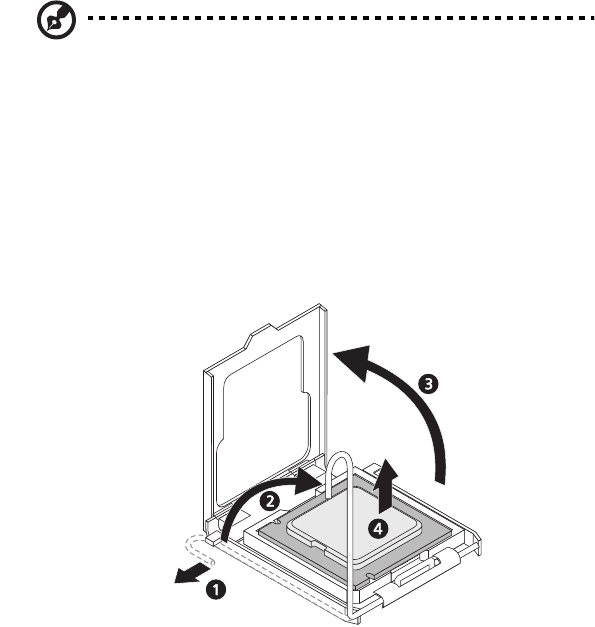
Removing the CPU
1 Push the socket retainer lever handle down and away from the
socket to release it (1).
2 Pull the lever to a fully open, upright position (2).
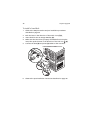
3 Lift the load plate (3).
4 Pull out the CPU from the socket (4).
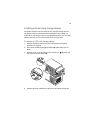
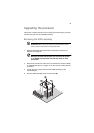
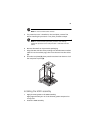
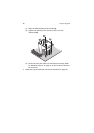
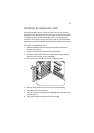
Installing the CPU
The mainboard has a 775-pin processor socket that support Intel
Pentium D, Pentium 4, or Celeron D processors.
1 Observe the ESD precautions and pre-installation instructions
described on page 25.
2 Locate the CPU socket on the mainboard.
3 Push the socket retainer lever handle down and away from the
socket, then pull the lever to a fully open, upright position.
4 Lift the load plate.