


NetVanta 3200/3300/3400 Series Unit Installation
61200860L1-34AB Copyright © 2012 ADTRAN, Inc. 65
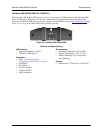
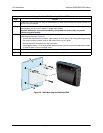
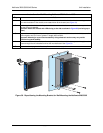
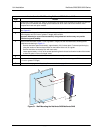
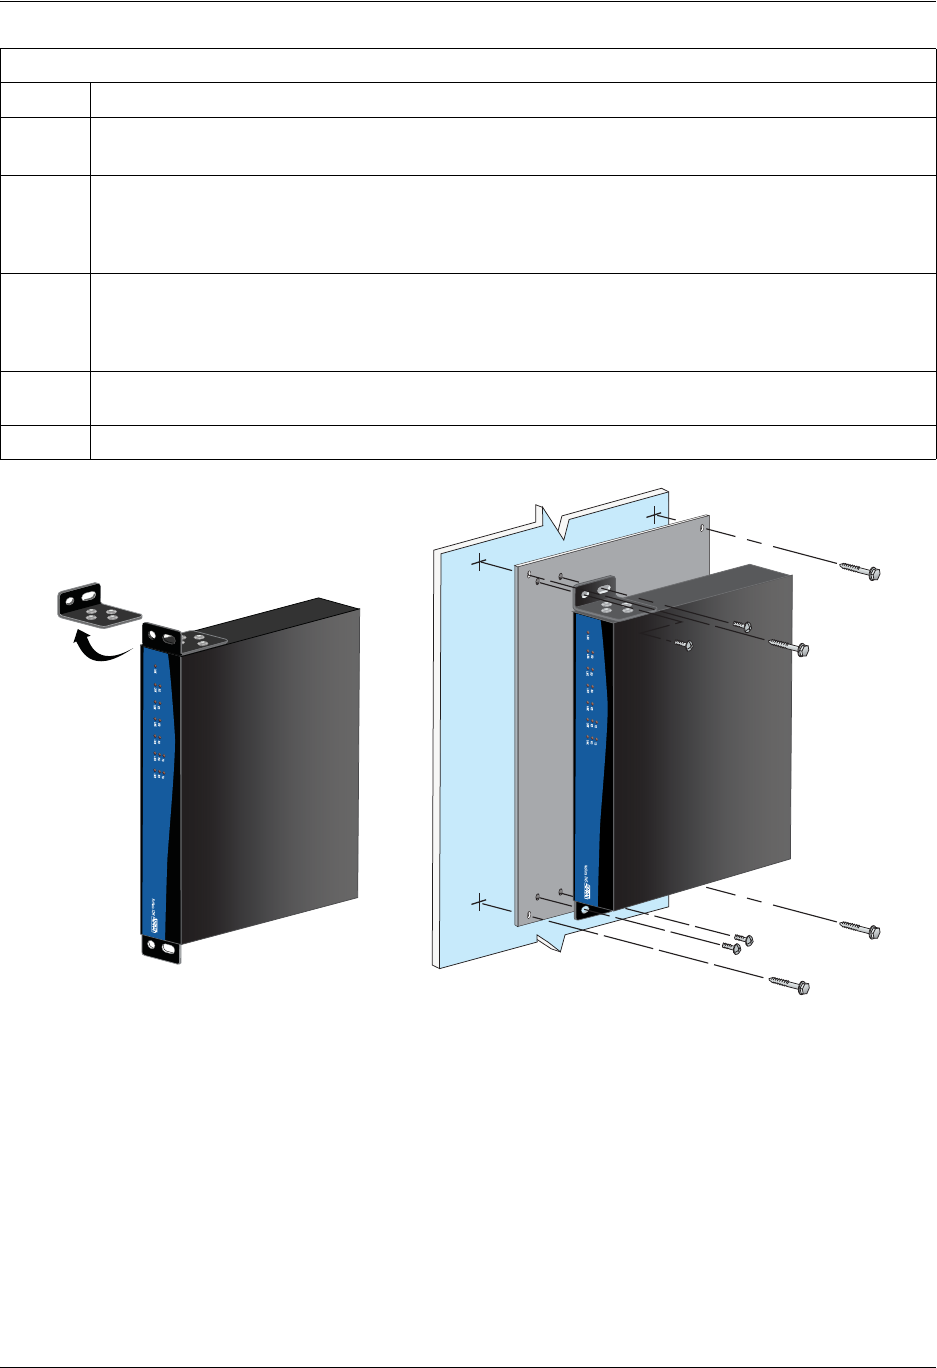
Figure 30. Repositioning the Mounting Bracket for Wall Mounting the NetVanta 3205/3305
Instructions for Wall Mounting NetVanta 3205/NetVanta 3305
Step Action
1
Remove the mounting ears. Rotate them 90
o
so that the portion of the bracket with the mounting holes is
flush with the bottom of the chassis, and reattach them to the chassis (see Figure 30).
2
Decide on a location for the unit. Keep in mind that the unit needs to be mounted at or below eye level so
that the LEDs are viewable.
Important! Mount the chassis with LEDs facing to the side as shown in Figure 30 (not facing up or
down).
3
Prepare the mounting surface by attaching a board (typically plywood, 3/4-inch to 1-inch thick) to a wall
stud using #6 to #10 (2.5-inch or greater in length) wood screws.
Important! Mounting to a stud ensures stability. Using sheetrock anchors may not provide
sufficient long-term stability.
4
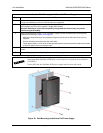
Have an assistant hold the unit in position as you install two #6 to #10 (1-inch or greater in length) wood
screws through the unit’s brackets and into the mounted board. See Figure 30.
5
Proceed to the steps given in Supplying Power to the Unit on page 69.