


Unit Installation NetVanta 3200/3300/3400 Series
66 Copyright © 2012 ADTRAN, Inc. 61200860L1-34AB
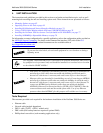
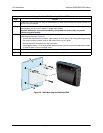
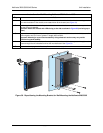
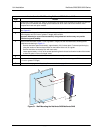
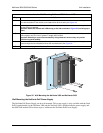
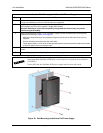
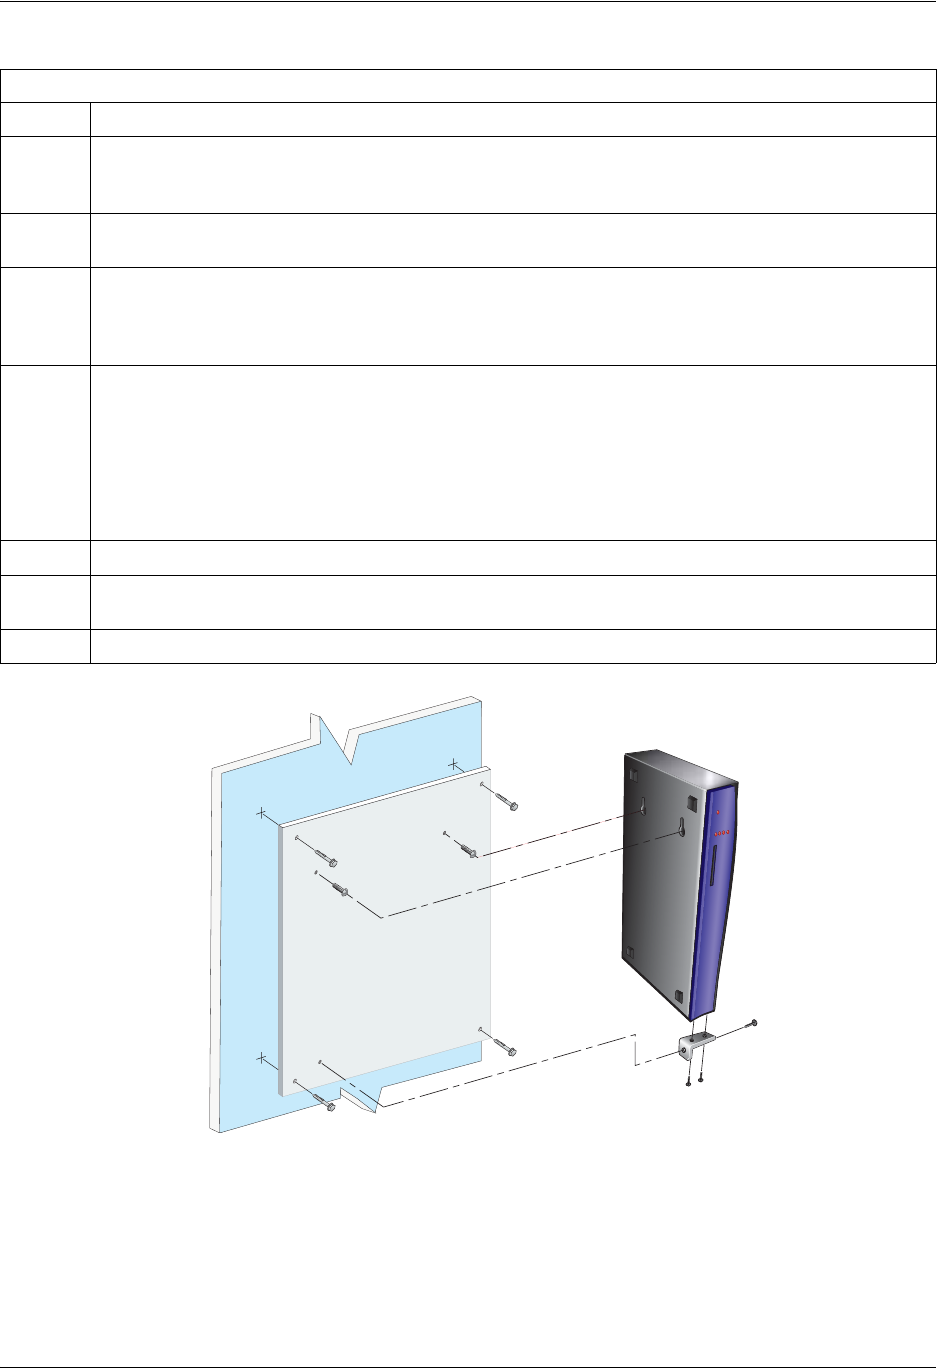
Figure 31. Wall Mounting the NetVanta 3430/NetVanta 3448
Instructions for Wall Mounting NetVanta 3430/NetVanta 3448
Step Action
1
Decide on a location for the unit. Keep in mind that the unit needs to be mounted at or below eye level so
that the LEDs are viewable and enough space needs to be left on each side for the removal of the
CompactFlash card and option module.
2
Attach the wallmount bracket to the bottom of the chassis using the two screws included with the shipment
(see Figure 31).
3
Prepare the mounting surface by attaching a board (typically plywood, 3/4-inch to 1-inch thick) to a wall
stud using #6 to #10 (2.5-inch or greater in length) wood screws.
Important! Mounting to a stud ensures stability. Using sheetrock anchors may not provide
sufficient long-term stability.
4
Install two #6 PAN head screws (1-inch or greater in length) into the mounted board, following these
guidelines and referring to Figure 31.
• Screws should be spaced horizontally, approximately 2 3/4 inches apart. Find exact positioning by
using the location of the two keyed insets on the bottom of the unit as a guide.
• Screws should be horizontally level with each other.
• Leave approximately 1/4-inch of the screws protruding from the board to allow the heads of the screws
to slide into place in the unit’s keyed insets.
5
Slide the keyed insets on the bottom of the unit’s chassis securely onto the screws.
6
Once the unit is hanging, screw the wallmount bracket securely to the wall using a #6 PAN head screw
(1.5-inch or greater in length).
7
Proceed to the steps given in Supplying Power to the Unit on page 69.