Top I/O Panel 143
2
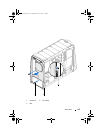
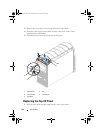
Connect the top I/O panel cables to the connectors on the system board
and master I/O board.
3
Replace the screws that secure the top I/O panel to the chassis.
4
Align the tabs on the panel insert with the slots on the computer chassis.
Postrequisites
1
Replace the front bezel. See "Replacing the Front Bezel" on page 131.
2
Replace the right-side bottom panel. See "Replacing the Right-Side
Bottom Panel" on page 123.
3
Replace the right-side middle panel. See "Replacing the Right-Side Middle
Panel" on page 114.
4
Replace the right lighting-board. See "Replacing the Right Lighting-Board"
on page 118.
5
Replace the right-side top panel. See "Replacing the Right-Side Top Panel"
on page 110.
6
Replace the PCI-fan. See "Replacing the PCI-Fan" on page 54.
7
Replace the PCI-Express x1 card. See "Replacing the PCI-Express x1 Card"
on page 50.
8
Replace the drive-bay shroud. See "Replacing the Drive-Bay Shroud" on
page 48.
9
Close the PCI shroud. See "Closing the PCI Shroud" on page 46.
10
Replace the left side-panel. See "Replacing the Left Side-Panel" on
page 27.
11
Follow the steps in "After Working Inside Your Computer" on page 15.
book.book Page 143 Wednesday, May 16, 2012 2:37 PM


