


7
Installing MasterSwitch VM
continued
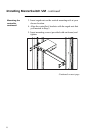
Hardwiring
procedure
1. Make sure that the unit is powered off.
2. Unplug any attached equipment to prevent damage if a
mistake is made during wiring.
3. Remove the inspection cover on the power inlet end of the
unit by removing the top two screws and sliding the
inspection cover off of the unit.
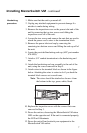
4. Loosen the two screws and remove the nuts that are used to
attach the power cord's wires to the termination block.
5. Remove the power inlet end cap by removing the
remaining two bottom screws and lifting the end cap off of
the unit.
6. Locate the provided hardwiring end cap (
APC
part number
870-8209
).
7. Attach a 3/4" conduit termination to the hardwiring end
cap.
8. Attach the hardwiring end cap assembly to the end of the
unit, using the screws removed in Step 5.
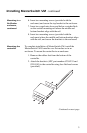
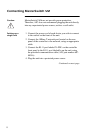
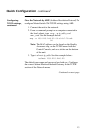
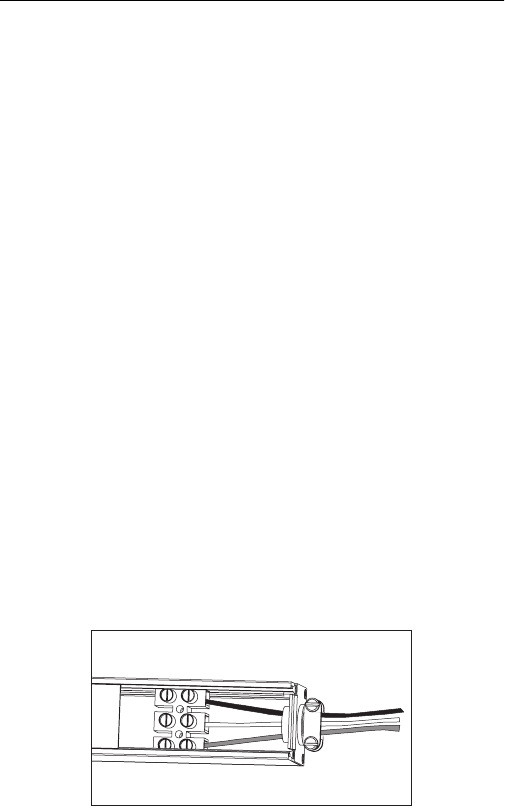
9. Attach wires to the terminal block as shown in the figure
below. Attaching the wires is easier to do if you back the
terminal block screws out several turns.
Note: The wires should be attached as shown—from
the bottom to the top: green, white, black.
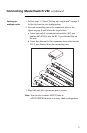
10. Replace the inspection cover with the screws that were
removedinStep3.
11. Power the unit on, observing the MasterSwitch
VM
status
LED on the opposite end. If the unit is connected properly,
the LED will illuminate.
12. Power the unit off and reattach your equipment to the
MasterSwitch
VM
outlets.