


Black Box®LB1350A/LB1351A
12
8 - INSTALLATION
For Half-Rack Mount installation:
Use the optional bracket kit, affix it to the unit. Then use 4 standard bolts and nuts (not
supplied), and fasten well to the rack.
Make sure to leave a gap of at least 2-3cm above the unit.
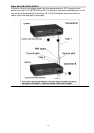
For wall mount installation
Three suitable holes on the back of the Black Box® LB1350A/LB1351A permit wall
mount Installation either horizontally (preferred) or vertically.
Two holes are 188mm apart for horizontal wall mount installation, for vertical wall mount
installation the two holes are 107mm apart.
Use two suitable screws having heads diameter less than 8mm
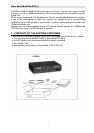
For Desktop use:
Affix the supplied plastic “feet” (after peeling off the adhesive
protecting sheet) to the bottom of the devices, with each “foot” approximately 1 cm from
each edge.
Place the device horizontally on a hard, clean surface (desk, shelf, etc.), leaving free
space around it for natural ventilation. Avoid putting the device on other active, heat
generating equipment and avoid putting such devices on the Black
Box®LB1350A/LB1351A
19” Rack installation
Use a standard flat shelf, install it in the rack and place one or two Black
Box®LB1350A/LB1351A side by side on the shelf. Make sure to leave a gap of at least
2-3cm above the unit.
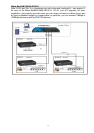
9 - POWER CONNECTION
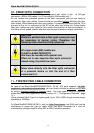
CAUTION: When connecting a device to an AC) power outlet,
always first connect the cord to the device, and ensure that it
is securely fastened. Only afterward connect the cord to the
wall outlet .Make sure to use grounded ( 3 way ) outlets.
For each country Black Box provides with the product an appropriate power
supply cord which is safety approved in accordance with such country’s
National Electric Code
Black Box®LB1350A/LB1351A
Connect AC line voltage at the rear of the converter, using the included power cord. The
Black Box®LB1350A/LB1351A will accept any line voltage from 100 to 240 VAC, 50-60
Hz.
There is no ON/OFF switch on the device. When the power is connected to the device,
the device is ON. This will be indicated by the POWER LED ON.
Important: following any connection or setup change (sections10,11,12
below) you must reset the device by either using S9 or by disconnecting
power and reconnecting it after few seconds