Conettix C900V2 | Installation Guide | 6.0 UL Standard 1610 and ULC S304 Intrusion System Installations
22 Bosch Security Systems, Inc. | 8/08 | F01U087780-01
6.2 Protected Premises Control
Panel with Digital Dialer Backup
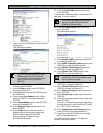
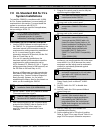
1. Use the D6200 Software to set the poll rate on
the C900V2. For UL approved installations, the
maximum interval is 360 seconds to meet the
requirement for polling supervision established
by UL. In most cases, to get a polling
supervision interval of 360 seconds, set the
Poll Rate to 240 and Retry to 13.
Because of differences in packet transmission
time latency within different networks, the poll
rate times vary. Contact Technical Support at
Bosch Security Systems, Inc. for assistance in
establishing the latency time for the network on
which you are installing the C900V2.
Refer to D6200 Software Operation and
Installation Guide (P/N: 4998154991).
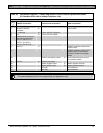
2. Set DIP Switch 7 to the ON position to enable
240-second supervision signals.
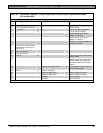
Refer to Table 5 on page 10 for the
functions of DIP Switches 5 through 9.
3. Add a telnet password to the communications
protocol of the C900V2 (refer to Section 4.5.3
Configuration Using Telnet, step 6, on
page 16). Retain this password for future
reference.
4. Program the control panel to send a daily test
signal through the digital dialer.
This tests the connection from the
control panel to the C900V2.
5. Connect Output 1 from the C900V2 to a
24-hour zone on the control panel.
This tests the digital dialer if the C900V2
CPU fails.
6. Connect Output 2 from the C900V2 to a
24-our zone on the control panel.
This tests the digital dialer if the network
communications path supervision fails.
You must use the C900V2 with a UL Listed
Burglary Alarm Control Unit or a UL Listed
combination Fire/Burglary Alarm Control
Unit with an integral or Listed digital alarm
communicator transmitter (DACT) installed
according to the manufacturer’s
instructions.
7. Install a tamper switch (such as a D110
Tamper Switch, available from Bosch Security
Systems, Inc.) on the control panel enclosure
and connect it to a 24-hour zone on the control
panel. If you use a separate enclosure for the
C900V2, install another tamper switch (D110)
on the enclosure and connect it to the same
24-hour zone.
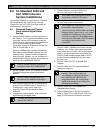
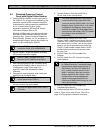
8. Set DIP Switch 5 to ON to enable Auto
Fallback.
9. Set DIP Switch 6 to OFF so three hang-ups
cause fallback.
Any error forces the C900V2 to switch
to Fallback Mode for 2 minutes the next
time the alarm panel seizes the line (if
DIP Switch 5 is ON or DIP Switch 6 is
OFF, or both, and the seizure occurs
within 2 minutes). Intercept errors are
always reported to the receiver. If the
receiver does not acknowledge the
signal in the programmed time, the
control panel digital dialer hangs up and
retries the message.
10. Set DIP Switch 9 to ON to enable Anti-
Substitution/Anti-Replay.
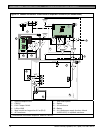
11. Set the shorting link on P3 to the H position.
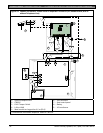
Refer to Figure 12 on page 20 and Table 10 on
page 21 for the proper connection sequence.


