


_____________________________________________________________________________________________________
Maintenance and Adjustments 61
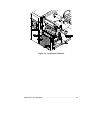
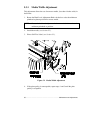
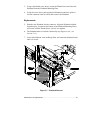
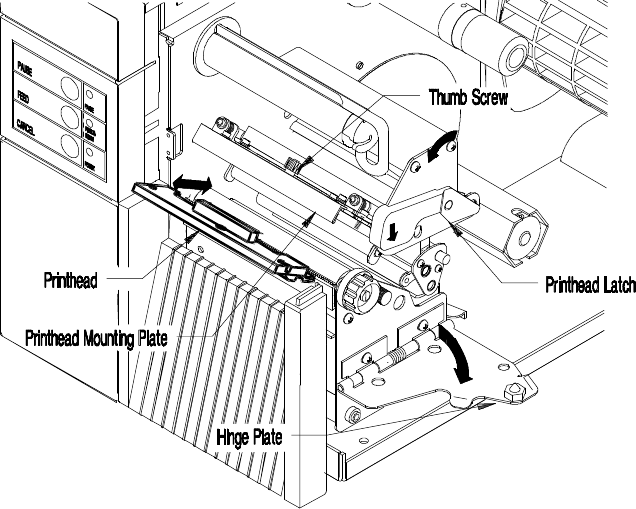
3. Using a flat-bladed screw driver, loosen the Thumb Screw and lower the
Printhead from the Printhead Mounting Plate.
4. Using the screw driver, push against the Printhead connector's guide to
free the connector from its socket, then remove the Printhead.
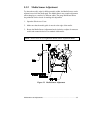
Replacement:
5. Push the new Printhead into the connector. Align the Printhead with the
alignment pins, (located on the bottom of the Printhead Mounting Plate),
and secure with the Thumb Screw, (do not over tighten).
6. The Printhead must be cleaned if touched by any fingers or oils, (see
Section 5.1.1).
7. Lower the Printhead, raise the Hinge Plate, and rotate the Printhead Latch
until it is closed.
Figure 5-5 Printhead Removal