


32 Brocade SMI Agent User’s Guide
53-1001778-01
Port configuration
3
Port configuration
This section describes how to configure the HTTP, HTTPS, ARR, and Eventing ports.
• “Configure HTTP and HTTPS ports” on page 32
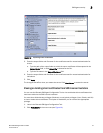
• “Configure ARR and eventing ports” on page 33
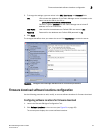
Configure HTTP and HTTPS ports
The SMI-A includes the CIM-XML and CIM-XMLS Client Protocol Adapters (CPA). By default, all are
installed and enabled for use. Each CPA uses a different TCP port to exchange WBEM requests and
responses. By default, the SMI-A has configured its supported CPAs to use the following ports:
• CIM-XMLS (HTTPS) on TCP port 5989
• CIM-XML (HTTP) on TCP port 5988
If multiple CIM agents are running at the same time on a system, they cannot use the same ports.
For example, some operating systems (such as Solaris 8 and Solaris 9) have a CIM agent
preinstalled and already running on standard CIM TCP ports. This can cause conflicts with the
SMI-A if both agents are listening on the same ports. In this case, you must configure each SMI-A to
use different ports. Refer to your operating system documentation for more information on whether
a CIM agent is running.
When you choose values for the HTTP and HTTPS ports, make sure they are not one of the assigned
TCP ports. The Configuration Tool does not check for this. You can see a list of assigned TCP ports
at:
http://www.iana.org/assignments/port-numbers
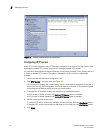
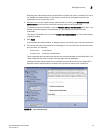
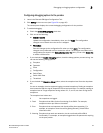
Configuring the HTTP and HTTPS ports
1. Launch the Brocade SMI Agent Configuration Tool.
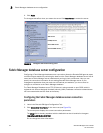
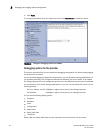
2. Click Server in the menu tree (see Figure 18 on page 33).
The content pane displays the current and configured HTTP and HTTPS ports.
Current means the SMI Agent is currently using these ports, provided the server is running.
Configured means the configuration is not in effect currently, but will be used when the server
is restarted.
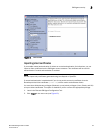
3. To change the settings, type new values in the Configured HTTP Port and Configured HTTPS
Port fields.
The value must be between 1 and 65535, inclusive.
Make sure the ports are not in use before you assign them; otherwise, the results will be
unpredictable.
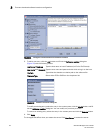
4. Click Apply.
The changes take effect when you restart the server. Click Start Server to restart the server.