16
Windows
®
USB
18
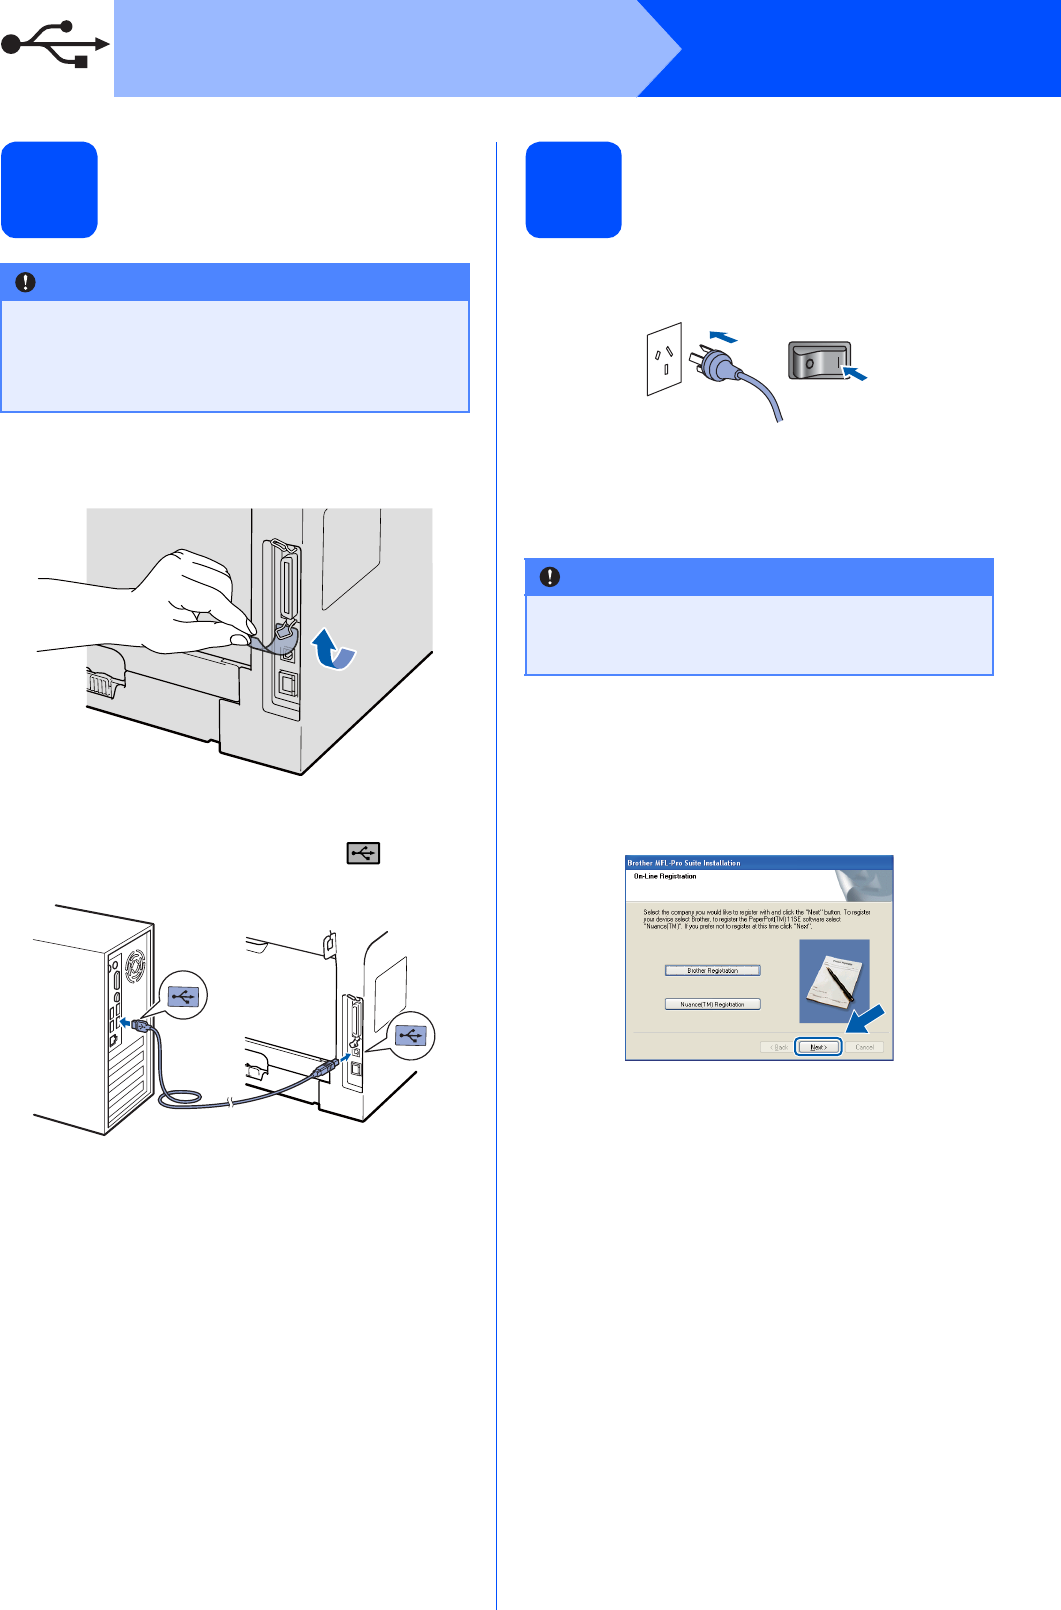
Connect the USB cable
a Remove the label covering the USB interface
connector.
b Connect the USB cable to the USB connector
on the machine marked with the symbol.
Then connect the cable to your computer.
19
Connect the power cord
a Plug the AC power cord into an AC outlet. Turn
the power switch on.
The installation will continue automatically.
The installation screens appear one after
another.
b When the On-Line Registration screen is
displayed, make your selection and follow the
on-screen instructions. Once you have
completed the registration process, close your
web browser to return to this window.
Then click Next.
IMPORTANT
• DO NOT connect the machine to a USB port
on a keyboard or a non-powered USB hub.
• Connect the machine directly to your
computer.
IMPORTANT
DO NOT cancel any of the screens during the
installation. It may take a few seconds for all
screens to appear.


