CHAPTER 4 DISASSEMBLY AND RE-ASSEMBLY
4-12
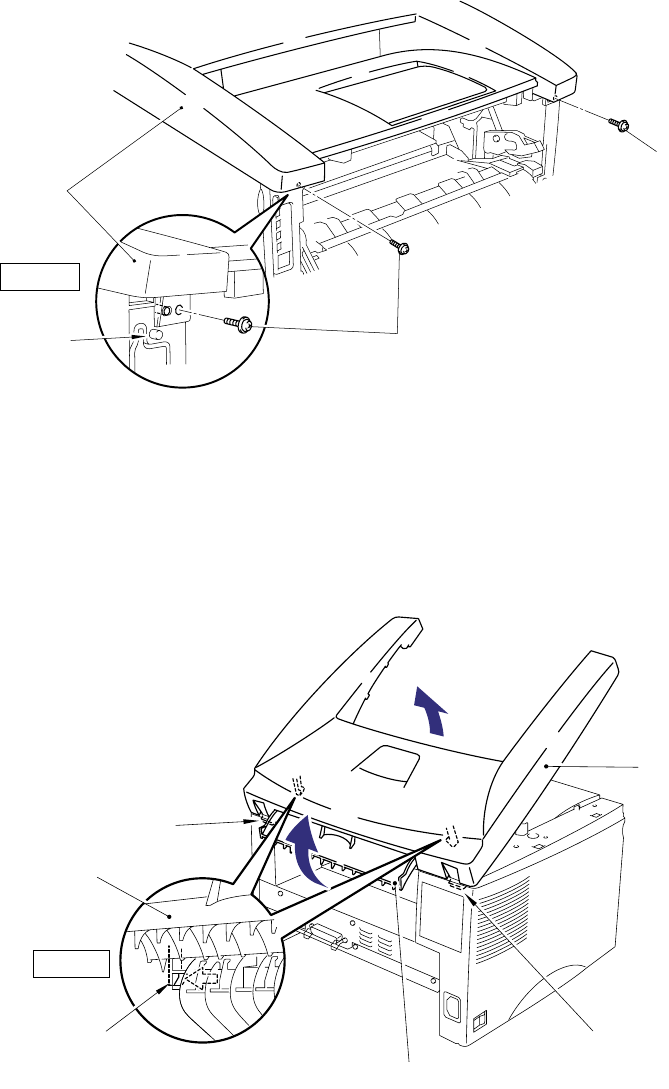
3.6 Top Cover
(1) Remove the two M3x10 Taptite screws securing the top cover.
(2) Release the hooks on either side of the top cover from the bosses on the main cover by
pulling the top cover forwards.
Fig. 4-19
(3) Open the rear cover, then release the hooks (A) at the right and left hand sides of the top
cover while pushing them towards the side of the printer from the rear.
(4) Lift up the top cover and release the hooks (B) at the right and left hand sides of the top
cover to remove the top cover.
Fig. 4-20
Taptite, cup M3x10
Taptite, cup M3x10
Top cover
Step (2)
Top cover
(hook (B))
(hook (B))
(hook (A))
Rear cover
Step (3)
Rear cover
(boss)


