8
Windows
®
USB
For USB Interface Cable Users
8
Install the printer driver
and connect the printer
to your computer
a Turn off the printer power switch.
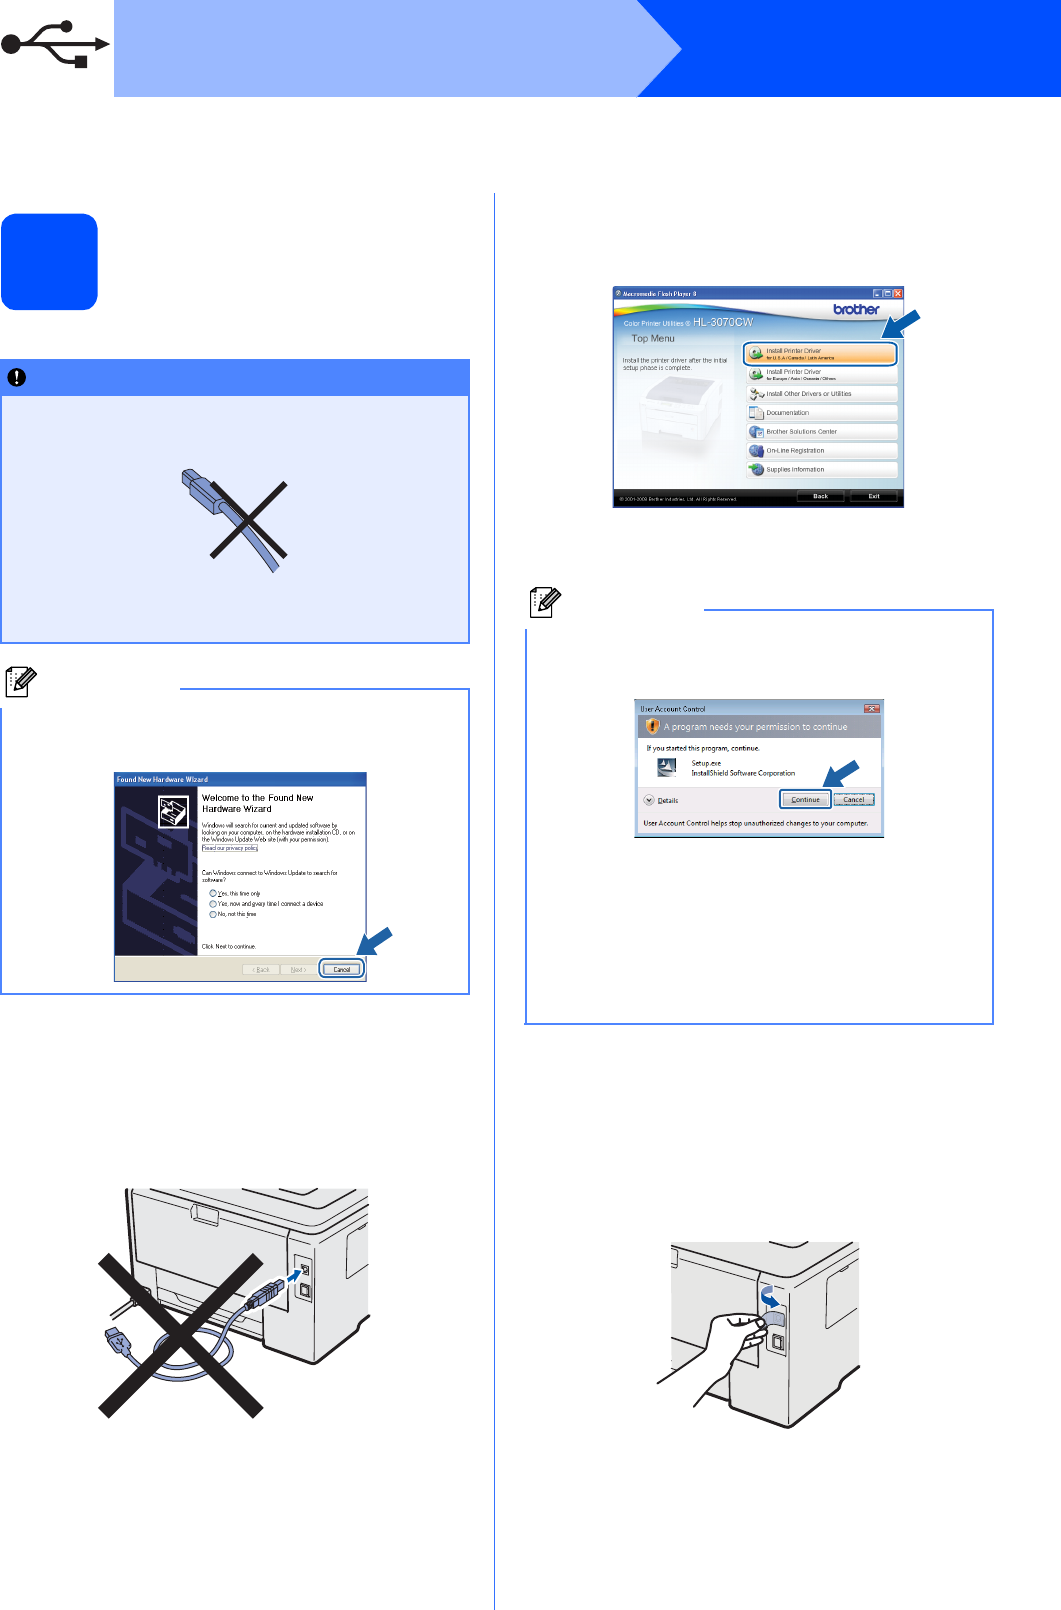
b Make sure the USB interface cable is NOT
connected to the printer, and then begin
installing the printer driver. If you have already
connected the cable, remove it.
c Turn on your computer. (You must be logged
on with Administrator rights.)
d Put the supplied CD-ROM into your CD-ROM
drive. The opening screen will appear
automatically.
Choose your printer model and the language.
e Click Install Printer Driver on the menu
screen.
f Click USB cable users.
g When the License Agreement window
appears, click Yes if you agree to the License
Agreement.
h Remove the label covering the USB interface
connector.
IMPORTANT
• DO NOT connect the USB interface cable
yet.
• Make sure there are no USB Flash memory
drive inserted.
Note
If the Found New Hardware Wizard appears on
your computer, click Cancel.
Note
• For Windows Vista
®
, when the User Account
Control screen appears, click Continue.
• If you want to install the PS driver (Brother’s
BR-Script Driver), choose Custom Setup and
then follow the on-screen instructions. When
the Select Components screen appears,
check PS (PostScript Emulation) Driver, and
then continue following the on-screen
instructions.


