35
SPECIFYING A LABEL SIZE
Before entering text, the label size must be set. A selection of preset layout sizes is available
for a variety of needs.
☞ Although the screens shown in the following explanations are for Windows
®
98, 98 SE
and Me, the operations for Windows
®
2000 and XP and Macintosh are the same unless
specifically mentioned.
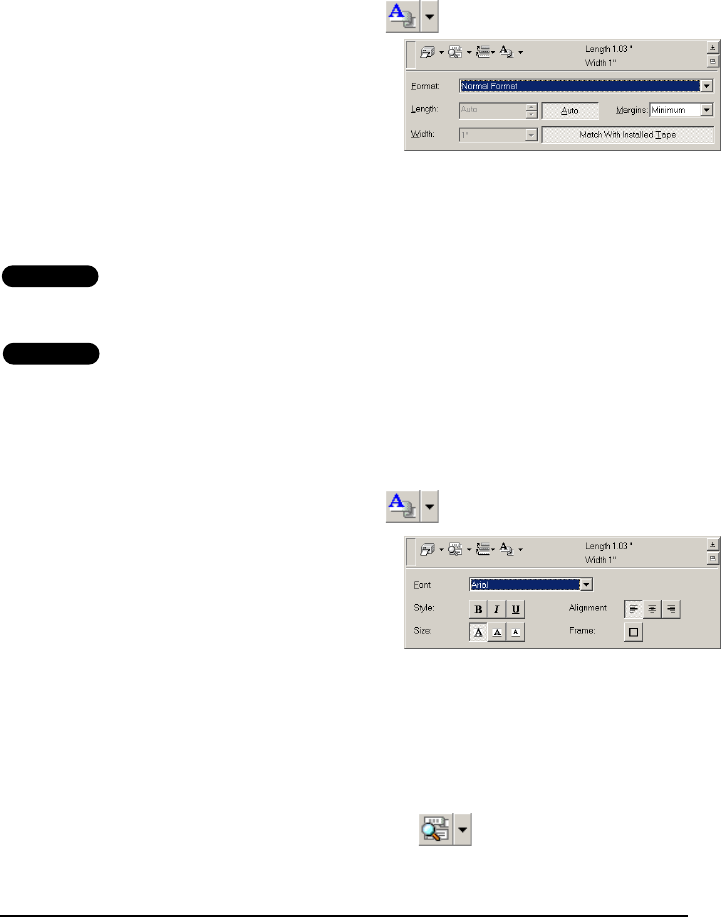
1 Click the arrow beside the Properties button to display a drop-down menu.
2 Click [Tape Settings] to display various label
format settings.
☞ The Tape Settings can also be dis-
played by selecting [View Properties],
then clicking [Tape Settings] in the
pop-up menu, displayed by right-click-
ing (Windows) or holding down the
Control key and clicking (Macintosh)
in the label view.
3 In the Format list, click the desired label format.
TZ-Tape
☞ The size of the label layout can also be set by specifying the Length and Width set-
tings or by dragging the edges of the label view until the layout is the desired size.
AV-Label
☞ Three preset label formats for AV labels are available, allowing you to easily create
address or file folder labels by simply selecting the format, then entering the text.
ENTERING TEXT
The entire text can quickly be formatted by specifying the font, size, style and alignment. In
addition, a frame can be drawn around the text.
1 Click the arrow beside the Properties button to display a drop-down menu.
2 Click [Text Settings] to display various text
format settings.
☞ The Text Settings can also be displayed
by selecting [View Properties], then
clicking [Text Settings] in the pop-up
menu, displayed by right-clicking
(Windows) or holding down the Con-
trol key and clicking (Macintosh) in the
label view.
3 In the Text Settings Properties, select the desired text formats.
4 Click in the label view, and then type or import the text.
☞ Typing in the label view shows the text as it will appear when it is printed. How-
ever, by clicking the Change View button , the text is displayed in the text
box, giving you a clearer view of the entered text.


