


1
2
3
4
5
6
7
8
9
42
z LABEL PRINTING
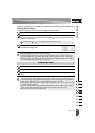
Attaching Labels
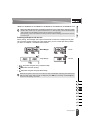
Printing Multiple Copies
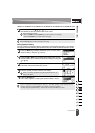
Using this function you can print up to 50 copies of the same label.
Make sure that the appropriate tape cassette is inserted and ready for printing.
Press the Shift key and then press the Print key to display the Copies screen, and then
select the number of copies to be printed using the or key, or type the number
using the number keys.
Press the OK or Enter key. "Printing...Copies" is displayed while
the labels are being printed.
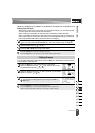
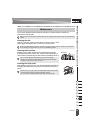
If necessary, trim the printed label to the desired shape and length using scissors, etc.
Peel the backing from the label.
Position the label and then press firmly from top to bottom with your finger to attach the
label.
1
2
Hold down the or key to change the number of copies faster.
3
•Press the Escape key to return to the previous step.
• The figures shown on the screen during printing indicate the “count / number of copies set”.
• Pressing the Space key when setting the number of copies resets the value to 1, the default.
• When the message "Cut Tape or Press Enter to Continue" is displayed, select one. For details,
see “Selecting how tape is fed and cut” on page 40.
Attaching Labels
1
2
3
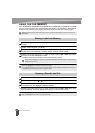
• The backing of some types of tapes may be pre-cut to make it easier to peel the backing. To
remove the backing, simply fold the label lengthwise with the text facing inward, to expose the
inside edges of the backing. Next, peel off the backing one piece at a time.
• Labels may be difficult to attach to surfaces that are wet, dirty, or uneven. The labels may peel
off easily from these surfaces.
• Be sure to read the instructions provided with Fabric Iron-On Tapes, Extra Strength Adhesive
Tapes or other special tapes and observe all precautions noted in the instructions.
• Please use scissors to cut Heat Shrink Tube.