E-22
2. Use u and i to display the name of the bar code you
want, and then press SET to delete it.
3. Press SET to delete the bar code.
NUMBERING
This label printer gives you a choice of four different number-
ing formats that you can use to print sequentially numbered
labels from 0 to 999.
Formats
1
: Number followed by up to 220
characters of text.
2
: Number preceded by up to 220
characters of text.
3
: Number with up to 110 charac-
ters of text on either side.
4
: Number only.
To print sequentially numbered labels
1. While the PRESETS menu is on the display, use u and
i to move the highlighting to “NUMBERING” and then
press SET.
–––
G
N
I
R
EB
M
UN
––
W
E
N
LLA
C
E
R
ETELE
D
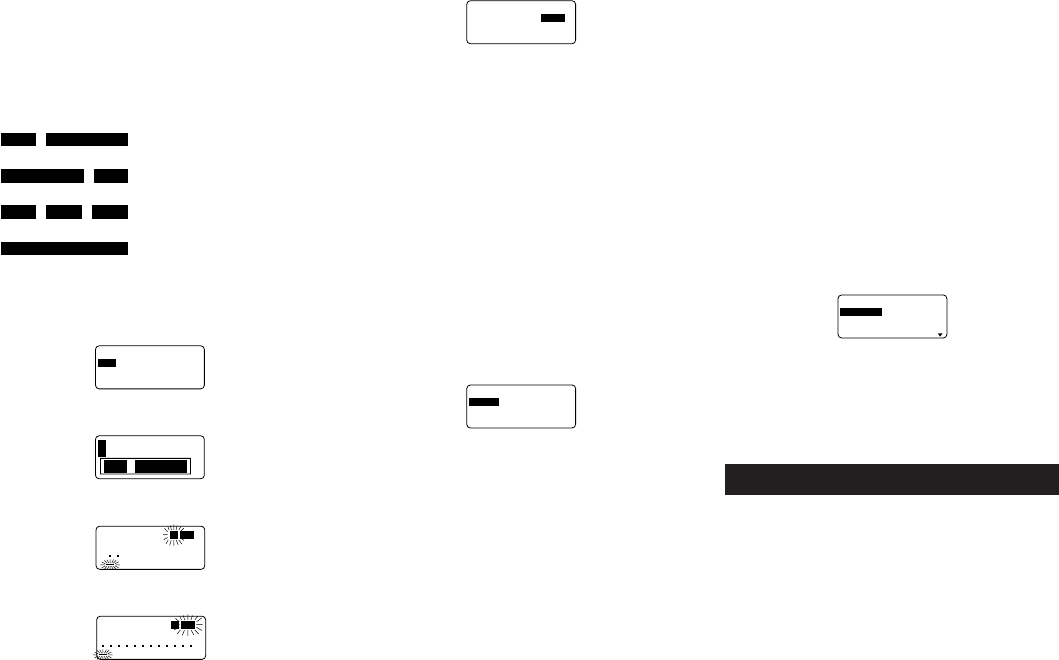
2. Use u and i to move the highlighting to “NEW” and
press SET.
4321
3. Use t and y to move the highlighting to the number of
the format you want and then press SET.
A
NAS
a
S
R
EB
M
UN
1
4. Input the starting number of the numbering sequence
and then press SET.
S
N
AS
T
N
E
MM
O
C
a
A
3. Now you can make changes in the numbering format
and print it or store it as a new format.
To delete a numbering format from memory
1. While the NUMBERING menu is on the display, use u
and i to move the highlighting to “DELETE” and then
press SET.
2. Use u and i to display the name of the numbering
format you want, and then press SET to delete it.
3. Press SET to delete the numbering format.
PHRASES
A collection of preset English phrases can be recalled quickly
and easily when you need them. See page E-26 for a com-
plete list of the preset phrases that are available.
To print a preset phrase
1. While the PRESETS menu is on the display, use u and
i to move the highlighting to “PHRASES” and then press
SET.
––––
SESA
RH
P
–––
N
IA
G
R
A
B
DN
E
B
T
O
N
O
D
ETA
C
ILP
UD
2. Use u and i to scroll through the preset phrases until
the one you want is highlighted and then press SET.
3. Use u and i to highlight “PRINT”, then press SET to
print the phrase.
4. Use u and i to move the highlighting to “EXIT” and
then press SET to end the operation.
Part 11 Stamp Printing
The stamp printing feature lets you create your own stamps
using a selection of various formats. Then you can print on
special stamp tape and attach the finished tape to an op-
tionally available stamp holder.
When using the ST-15 stamp holder, select NL (10 × 55mm)
as the stamp holder type in step 3 of the procedure de-
scribed below.
Important! Note that an optional special stamp tape car-
tridge and stamp tape holder is required in order to create a
pre-inked stamp. Contact your dealer to purchase the nec-
essary tape and holder. Load the special stamp tape before
performing the following procedure.
5. Input any comment text you want and then press SET.
–––
G
N
I
R
EB
M
UN
––
Z
R
O
HN
O
IT
C
E
R
I
D
LA
M
R
O
NR
O
RR
I
M
• You can also specify the font, character style, and text
effects if you want.
6. Specify the print direction (page E-17) and either mirror
or normal printing (page E-17).
• Use u and i to move the highlighting between items,
and t and y to change each setting.
7. After making the settings you want, press SET.
8. Use u and i to move the highlighting to “PRINT” and
then press SET to execute it.
• The label printer prints a tape with the number and com-
ment text, and then displays the screen shown in step 3,
with the number incremented by one.
9. Repeat steps 4 through 7 to print as many sequentially
numbered labels as you want.
10.To quit the numbered label operation, press ESC and
then SET.
To store a numbering format
1. Perform steps 1 to 7 to create the numbering format so
the following is on the screen.
–––
G
N
I
R
EB
M
UN
––
T
N
I
R
P
E
R
O
TS
TIXE
2. Use u and i to move the highlighting to “STORE” and
then press SET.
3. Input up to five characters for the name of the number-
ing format, and then press SET.
4. Press SET to store the numbering format or ESC to abort
the operation without storing anything.
5. Use u and i to move the highlighting to “EXIT” and
then press SET.
6. Press SET to end the operation.
To recall a numbering format from memory
1. While the NUMBERING menu is on the display, use u
and i to move the highlighting to “RECALL” and then
press SET.
2. Use u and i to display the name of the numbering
format you want, and then press SET to recall it.


