


Getting Ready
30
Getting Ready
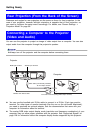
This section explains how to set up the projector to get it ready for use, and how to connect
it to an input source (computer or video device).
It also includes information about how to turn on the projector, how to select the display
language the first time you turn it on, and precautions you need to keep in mind concerning
the power supply.
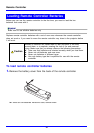
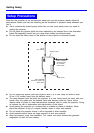
Locate the projector on a desk, table, or stand that is firm and level. Make sure to allow
sufficient space around the sides and back of the projector for proper ventilation.
z The following illustrations show how the projector should be oriented for optimum
projection relative to the screen.
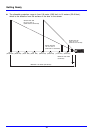
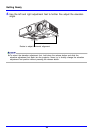
z You can place the projector on a surface that is angled up to 30 degrees up or down
during use. Angling the projector more than 30 degrees up or down can cause rupture
or premature aging of the projector’s lamp, or malfunction of the projector.
z The above setup enables proper projection without any image correction. If the projector
is at an angle to the screen, a phenomenon called “keystoning” will occur, which causes
the sides, and/or the top and bottom of the image to be different lengths. The projector
comes with a keystone correction feature that automatically corrects the image. See
“Keystone Correction (KEYSTONE)” on page 53 for information about keystone correction.
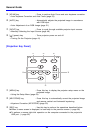
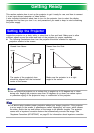
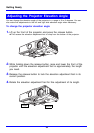
Setting Up the Projector
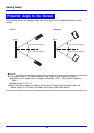
Viewed from Above
Viewed from the Side
Screen
Screen
The center of the projector’s lens
should be aligned with the horizontal
center of the screen.
Make sure the projector is at a right
angle to the screen.