


20 PA-5EFL Ethernet 10BASE-FL Port Adapter Installation and Configuration
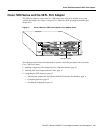
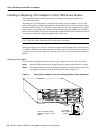
VIP2 and the 5EFL Port Adapter
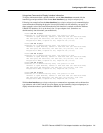
Step 3 If IP routing is enabled on the system, you can assign an IP address and subnet mask to
the interface with the ip address configuration subcommand, as in the following
example:
Router(config-int)# ip address 1.1.1.10 255.255.255.0
Step 4 Add any additional configuration subcommands required to enable routing protocols and
set the interface characteristics.
Step 5 Change the shutdown state to up and enable the interface as follows:
Router(config-int)# no shutdown
Step 6 Configure additional interfaces as required.
Step 7 When you have included all of the configuration subcommands to complete the
configuration, press Ctrl-Z to exit configuration mode.
Step 8 Write the new configuration to nonvolatile memory as follows:
Router# copy running-config startup-config
[OK]
Router#
To check the interface configuration using show commands, proceed to the section “Checking the
Configuration.”
Checking the Configuration
After configuring the new interface, use the show commands to display the status of the new
interface or all interfaces and the ping command to check connectivity.
Using show Commands to Verify the VIP2 Status
The following steps use show commands to verify that the new interfaces are configured and
operating correctly.
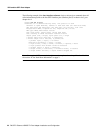
Step 1 Display the system hardware configuration with the show version command. Ensure that
the list includes the new serial interfaces.
Step 2 Display all the current interface processors and their interfaces with the show controllers
cbus command. Verify that the new VIP2 appears in the correct slot.
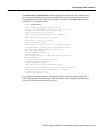
Step 3 Specify one of the new serial interfaces with the show interfaces type slot/port
adapter/interface command and verify that the first line of the display specifies the
interface with the correct slot number. Also verify that the interface and line protocol are
in the correct state: up or down.
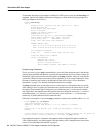
Step 4 Display the protocols configured for the entire system and specific interfaces with the
show protocols command. If necessary, return to configuration mode to add or remove
protocol routing on the system or specific interfaces.
Step 5 Display the running configuration file with the show running-config command. Display
the configuration stored in NVRAM using the show startup-config command. Verify
that the configuration is accurate for the system and each interface.
If the interface is down and you configured it as up, or if the displays indicate that the hardware is
not functioning properly, ensure that the network interface is properly connected and terminated. If
you still have problems bringing the interface up, contact a service representative for assistance.