3-5
Cisco AVS 3120 Application Velocity System Hardware Installation Guide
OL-11805-01
Chapter 3 Installing the AVS 3120
Installing Your AVS 3120
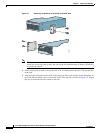
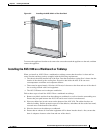
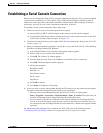
Figure 3-2 Installing the AVS 3120 in a Two-Post Rack
To remove the appliance from the rack, remove the screws that attach the appliance to the rack, and then
remove the appliance.
Installing the AVS 3120 on a Workbench or Tabletop
When you install an AVS 3120 on a workbench or tabletop, ensure that the surface is clean and in a
secure location and that you have complied with the following requirements:
• The chassis should be installed off of the floor. Dust that accumulates on the floor is drawn into the
interior of the chassis by the cooling fans. Excessive dust inside the AVS 3120 can cause
overtemperature conditions and component failures.
• There must be approximately 19 inches (48.26 cm) of clearance at the front and rear of the chassis
for accessing network cables and equipment.
• The AVS 3120 must receive adequate ventilation.
Follow these steps to install the AVS 3120 on a workbench or tabletop:
1. Remove any debris and dust from the tabletop or workbench, as well as from the surrounding area.
Ensure that your path between the AVS 3120 and its new location is unobstructed.
2. Place one rubber foot in each corner on the bottom of the AVS 3120. The rubber feet have an
adhesive backing. Peel the protective tape off of the adhesive, and adhere the feet to the four round,
recessed areas on the bottom of the chassis.
3. Place the chassis on the tabletop or workbench.
4. Ensure that no exhaust air from other equipment will be drawn into the chassis. Also, ensure that
there is adequate clearance at the front and rear of the chassis.
143772
P
O
W
E
R
S
T
A
T
U
S
F
L
A
S
H
C
i
s
c
o
A
V
S
3
1
2
0
s
e
r
i
e
s
A
p
p
l
i
c
a
t
io
n
V
e
lo
c
i
t
y
S
y
s
t
e
m


