


2-7
Cisco Aironet 1000 Series Lightweight Access Point Hardware Installation Guide
OL-9403-04
Chapter 2 Installing the Access Point
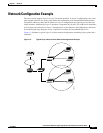
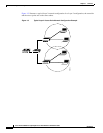
Deploying the Access Points on the Wireless Network
• DHCP server discovery—Uses DHCP Option 43 to provide controller IP addresses to the access
points. Cisco switches support a DHCP server option. For additional information, refer to the
“Configuring DHCP Option 43” section on page F-1.
• DNS server discovery—The access point uses the name CISCO-LWAPP-CONTROLLER.<local
domain> to discover the controller IP addresses from a DNS server. Where <local domain> is the
access point domain name.
Cisco recommends that you configure a DHCP server with Option 43 to provide the controller IP
addresses to your access points. Cisco switches provide a DHCP server option that is typically used for
this purpose.
Deploying the Access Points on the Wireless Network
Prior to beginning the actual access point deployment, perform these tasks:
• Ensure a site survey has been preformed.
• Ensure your network infrastructure devices are operational and properly configured.
• Ensure your controllers are connected to switch trunk ports.
• Ensure your switch is configured with untagged access ports for connecting your access points.
• Ensure a DHCP server with Option 43 configured is reachable by your access points.
• Review the “Mounting Overview” section on page 2-8.
To deploy your access points, follow these steps:
Step 1 Obtain the access point location map created during your building site survey.
Step 2 Review the access point locations and identify the specific mounting methods required for each access
point location.
Step 3 For each access point perform these steps:
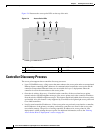
a. Record the access point MAC address on the access point location map (see the “Returning MAC
Information” section on page 2-20).
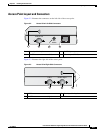
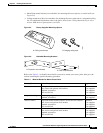
b. Mount the access point at the indicated destination using the specified mounting method. For
specific mounting instructions, see these sections:
–
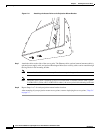
Horizontal surface, such as a ceiling (see the Mounting Access Points Using a Ceiling-Mount
Base, page 2-10).
–
Below a suspended ceiling (see the “Mounting Access Points Using the Ceiling-Mount Clips”
section on page 2-11).
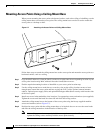
–
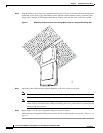
Perpendicular to a vertical surface, such as a wall (see the “Mounting the Access Point Using a
Projection Wall Mount Bracket” section on page 2-13).
–
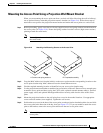
Parallel to a vertical surface, such as a wall ( see the “Mounting the Access Point Using the
Flush-Mount Bracket” section on page 2-15).
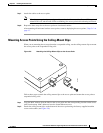
c. Optionally secure the access point using a security cable (see the “Securing the Access Point Using
a Security Cable” section on page 2-17).
d. Connect the access point cables (Ethernet, optional power, optional antennas). For instructions see
the “Connecting the Ethernet and Power Cables” section on page 2-17.