


2-8
Cisco Aironet 1000 Series Lightweight Access Point Hardware Installation Guide
OL-9403-04
Chapter 2 Installing the Access Point
Mounting Overview
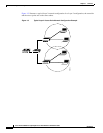
e. On power up, verify that the access point is associated to a controller and operating normally. The
Power LED should be green, the Alarm LED should be off, and the radio LEDs should be blinking.
For additional information, see the “Powering Up the Access Point” section on page 2-19.
Step 4 After all access points are deployed and operating correctly, ensure that a controller is not configured as
a master controller. A master controller should only be used for configuring access points and not in a
working network.
Mounting Overview
You can mount the access point on any of the following surfaces:
• Horizontal or vertical flat surfaces, such as walls or ceilings
• Suspended ceilings (above and below)
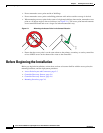
Caution The access point, the antennas, and the power source (power injector or power module) are not designed
for outdoor use and must be located in an indoor environment.
Caution The power injectors and power modules should not be placed in a building’s environmental air space, such
as above suspended ceilings.
Note The access point provides adequate fire resistance and low smoke-producing characteristics suitable for
operation in a building's environmental air space (such as above suspended ceilings) in accordance with
Section 300-22(C) of the National Electrical Code (NEC).
Note When mounting the access point in a building’s environmental air space, you must use only the metal
projection-mount or the flush-mount brackets (not the plastic ceiling-mount base or the hanging-ceiling
clips), and the access point must be powered using PoE. Also, only the integrated antennas can be used.
Note When mounting the access point in a building’s environmental air space, you must use Ethernet cable
suitable for operation in environmental air space in accordance with Section 300-22(C) of the National
Electrical Code (NEC).
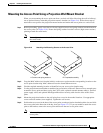
The access point supports mounting hardware to allow wall, ceiling, or suspended ceiling mounting:
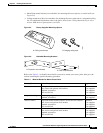
• Ceiling-mount base for mounting the access point to a horizontal surface–supplied with the access
point (see Figure 2-5)
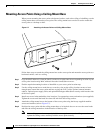
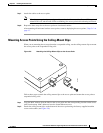
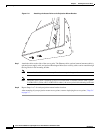
• Two suspended ceiling hanging-clips for mounting the access point below a suspended
ceiling–supplied with the access point (see Figure 2-6)
• Metal projection-mount bracket (user orderable) for mounting the access point to a vertical wall (see
Figure 2-6)