—32—
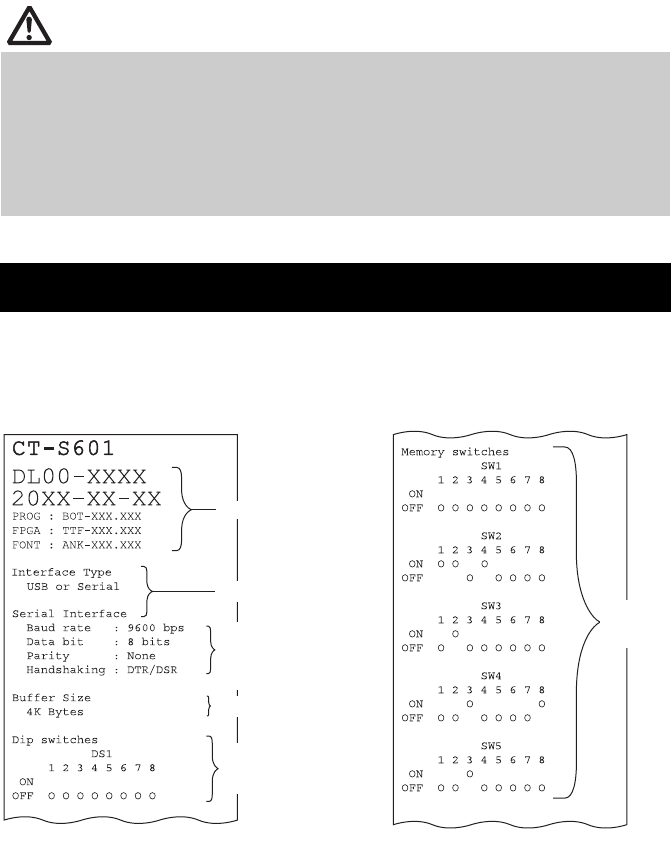
While paper is loaded, press and hold the FEED button while turning the power
on. Hold the FEED button down for about one second and then release it to start
self-printing. The printer prints its model name, version, DIP switch settings,
memory switch settings, and a list of built-in fonts.
Note:
*:Printers with a USB interface do not have DIP switches, so the DIP switches all appear off on the
self-printing printout.
CAUTION
Before starting to do maintenance work, be sure to turn off the printer and unplug the
power cord from the electric outlet.
Be careful not to touch the manual cutter while the front cover is open.
Be careful not to touch the opening for the auto cutter while the paper cover is open.
The print head is hot immediately after printing. Do not touch it.
Do not touch the print head with bare hands or metal objects.
If the above procedure does not retract the auto cutter, contact your Citizen Systems
dealer.
4.4 Self-printing
DIP switch settings*
(USB or Serial interface
models only)
Buffer size
Serial communication
status
(USB or Serial interface
models only)
Interface
Firmware version
Memory
switch
setting


