


United States January 2, 2003
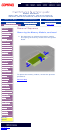
Presario 1600 Series
Models: 1600T, 1600-XL140, 1600-XL141, 1600-XL142, 1600-XL143,
1600-XL144, 1600-XL145, 1600-XL146, 1600-XL147, and 1600-XL150
Before You Begin Product Description Parts Catalog
Specifications Battery Operations Pin Assignments
Removal Sequence Troubleshooting MSG Index
Preliminary
Steps
Clearing the
Power-On
Password
Power-On Self
Test (POST)
Compaq
Diagnostics
Diagnostic
Error Codes
Troubleshooting
Without
Diagnostics
Solving Minor
Problems
Contacting
Compaq
Support
Troubleshooting
Compaq Diagnostics
Compaq Diagnostics are installed on the hard drive of the
computer. Run the Diagnostic utilities when you want to view or
test system information and if you have installed or connected
devices. If you run Compaq Diagnostics from a diskette, ensure
that it is version 10.11 or later.
The Diagnostics menu includes the following utilities:
● Computer Checkup (TEST)
● View System Information (INSPECT)
● Prepare Computer for a Compaq Service Call (RemotePaq)
If you have a problem you cannot solve, run the Diagnostics
utilities before you call for support. Run Computer Checkup and
select to save the device list to a file and to print or to save the
log of errors. Run the View System Information (INSPECT) utility
and select to print or to save that information. Have the files or
the printed information available when you call for support.
Computer Checkup (TEST)
Computer Checkup (TEST) determines whether the various
computer components and devices are recognized by the system
and are functioning properly. You can display, print, or save the
information generated by Computer Checkup.
Follow these steps to run Computer Checkup:
1. Plug the computer into an external power source. (A low
battery condition could interrupt the program.)
2. Turn on the external devices that you want to test. Connect
the printer if you want to print a log of error messages.
3. Insert the Compaq Diagnostics diskette in drive A.
4. Turn on or restart the computer. The computer starts from
drive A, and the Diagnostics Welcome screen appears.
5. Press Enter to continue. The Diagnostics menu appears.
6. Select Computer Checkup from the Diagnostics menu. A
Test Option menu appears.
7. Select View the Device List from the Test Option menu. A
list of the installed Compaq devices appears.
8. If the list of installed devices is correct, select OK. The Test
Option menu appears.
NOTE:
If the list is incorrect, ensure that any new
devices are installed properly.
9. Select one of the following from the Test Option menu:
■ Quick Check Diagnostics. Runs a quick, general test on
each device with a minimal number of prompts. If errors
occur, they display when the testing is complete. You
cannot print or save the error messages.
■ Automatic Diagnostics. Runs unattended, maximum
testing of each device with minimal prompts. You can
choose how many times to run the tests, to stop on
errors, or to print or save a log of errors.
■ Prompted Diagnostics. Allows maximum control over
testing the devices. You can choose attended or
unattended testing, decide to stop on errors, or choose to
print or save a log of errors.
10. Follow the instructions on the screen as the devices are
tested. When testing is complete, the Test Option menu
appears.
11. Exit the Test Option menu.
12. Exit the Diagnostics menu.
View System Information (INSPECT)
The View System Information (INSPECT) utility provides
information about the computer and installed or connected
devices. You can display, print, or save the information.
Follow these steps to run View System Information (INSPECT)
from the Compaq Diagnostics diskette:
1. Turn on the external devices that you want to test. Connect
the printer if you want to print the information.
2. Insert the Compaq Diagnostics diskette in drive A.
3. Turn on or restart the computer. The computer starts from
drive A, and the Diagnostics Welcome screen appears.
4. Press Enter to continue. The Diagnostics menu appears.
5. Select View System Information (INSPECT) from the
Diagnostics menu.
6. Select the item you want to view from the following list:
System Memory
ROM Audio
Keyboard Operating system
System ports System files
System storage Windows files
Graphics
7. Follow the instructions on the screen to cycle through the
screens, to return to the list and choose another item, or to
print the information.
Top of Page
privacy and legal statement