


CONNECTING: Your Monitor to Your Computer
18
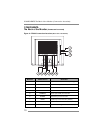
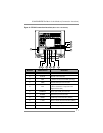
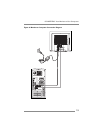
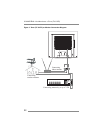
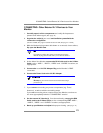
10. Connect the round AC/DC Adapter Plug to the Monitor’s “PWR”
connector.
11. Connect the Power Cord to the AC/DC Adapter.
Do not
plug the Power Cord into the wall outlet/surge
protector yet.
12.
Stand up your Monitor and adjust it
for proper viewing.
(See page 14.)
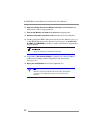
13. Plug in the Power Cords for both the Monitor and Computer to the wall
power outlet or surge protector.
14. Turn
ON
both the Monitor and Computer.
15.
Remove the plastic protective cover
from the front of the Monitor.
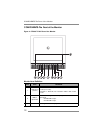
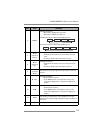
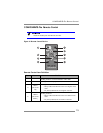
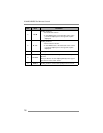
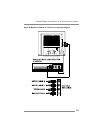
16. Pressing either the SELECT button on the front of the Monitor
(page 12)
or the SOURCE button on the Remote Control
(page 15)
, scroll to the
ANALOG Input Source option.
Insert the battery into the Remote Control.
17. Insert the Set-up Disk into your Computer’s CD slot and follow the
instructions on page 27.
18. If necessary, fine-tune the display by using the On Screen Display
(OSD) menus (image position, brightness, and other items).
(See page 26.)
19. Enjoy your new Monitor from Cornea Systems, Inc.!
Save the original container and the packing materials in
case there are difficulties and you need to return the
Monitor.