


Back to Contents Page
Before You Begin
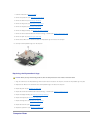
Dell™Vostro™1700andInspiron™1720/1721ServiceManual
Recommended Tools
Before Working Inside Your Computer
This document provides procedures for removing and installing the components in your computer. Unless otherwise noted, each procedure assumes that:
l You have performed the steps in Before Working Inside Your Computer.
l You have read the safety information in your Dell Product Information Guide.
l When replacing a component, you have already removed the original, if installed.
Recommended Tools
The procedures in this document may require the following tools:
l Small flat-blade screwdriver
l Phillips screwdriver
l Small plastic scribe
l Flash BIOS update (see the Dell Support website at support.dell.com)
Before Working Inside Your Computer
Use the following safety guidelines to help protect your computer from potential damage and to help ensure your own personal safety.
1. Ensure that the work surface is flat and clean to prevent the computer cover from being scratched.
2. Click Start , click the arrow icon, and then click Shut Down to turn off your computer.
3. Disconnect your computer and all attached devices from their electrical outlets.
4. Disconnect any telephone or network cables from the computer.
5. Remove any installed cards from the ExpressCard slot (see Removing an ExpressCard or Blank) and the 8-in-1 memory card reader (see Removing a
Memory Card or Blank).
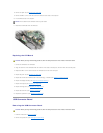
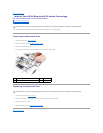
6. Turn the computer over.
NOTE: The color of your system and certain system components may appear differently than shown in this document.
CAUTION: Before you begin any of the procedures in this section, follow the safety instructions in the ProductInformationGuide.
NOTICE: Only a certified service technician should perform repairs on your computer. Damage due to servicing that is not authorized by Dell is not
covered by your warranty.
NOTICE: To avoid electrostatic discharge, ground yourself by using a wrist grounding strap or by periodically touching an unpainted metal surface, such
as a connector on the back of the computer.
NOTICE: Handle components and cards with care. Do not touch the components or contacts on a card. Hold a card by its edges or by its metal
mounting bracket. Hold a component such as a processor by its edges, not by its pins.
NOTICE: When disconnecting a cable, pull on the cable's connector or on its strain-relief loop, not on the cable itself. For cable connectors with locking
tabs, press inward on the locking tabs to release the connector. When connecting a cable, ensure that the connectors are correctly oriented and
aligned to avoid damage to the connector and/or the connector's pins.
NOTE: Ensure that the computer is off and not in a power management mode. If you cannot shut down the computer using the operating system,
press and hold the power button for 4 seconds.
NOTICE: To disconnect a network cable, first unplug the cable from your computer, and then unplug it from the network wall jack.
NOTICE: To help prevent damage to the system board, you must remove the battery from the battery bay before you service the computer.
NOTE: To avoid damage to the computer, use only the battery designed for this particular Dell computer. Do not use batteries designed for other Dell
computers.