


Back to Contents Page
Battery Latch Assembly
Dell™Vostro™1700andInspiron™1720/1721ServiceManual
Removing the Battery Latch Assembly
Replacing the Battery Latch Assembly
Removing the Battery Latch Assembly
1. Follow the instructions in Before You Begin.
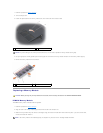
2. Remove the computer base (see Computer Base).
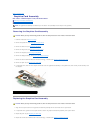
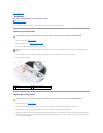
3. Remove the screw from the battery latch assembly.
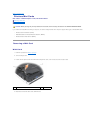
4. Use a plastic scribe to push the battery release button through the hole in the battery latch assembly.
5. Remove battery latch assembly.
Replacing the Battery Latch Assembly
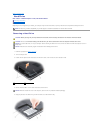
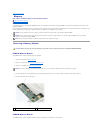
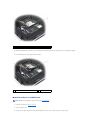
1. Ensure that the battery latch spring is properly mounted on the guide post of the battery latch assembly.
2. Align the guide post on the battery latch assembly with the slot on the base of the computer, then lower the latch assembly into place.
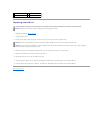
3. Align the battery release button with the hole in the battery latch assembly, then press the button into place.
4. Replace the computer base (see Replacing the Computer Base).
CAUTION: Before you begin the following procedure, follow the safety instructions in the Product Information Guide.
NOTICE: The battery latch spring is not secured to the latch assembly and can be easily misplaced. When removing the battery latch assembly, place
the spring in a secure location until the latch is ready to be reinstalled.
NOTICE: Before you remove the battery release button, observe the orientation of the button to ensure proper installation when the button is
replaced.
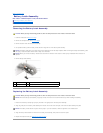
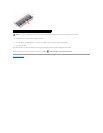
1
screw
2
battery latch assembly
3
spring
4
battery release button
CAUTION: Before you begin the following procedure, follow the safety instructions in the Product Information Guide.
NOTICE: Ensure the battery latch assembly is properly oriented. The indent for the screw should face up when installing the assembly.
NOTICE: The battery release button is keyed to ensure proper. If you feel resistance, check the alignment of the release button.