


Removing PCI and PCI Express Cards
1. Follow the procedures in Before You Begin.
2. Remove the computer cover (see Removing the Computer Cover).
3. Disconnect any cables connected to the card.
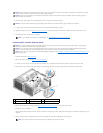
4. Press down the tab on the top of the card retainer at the appropriate card slot and pivot the card retainer back through the chassis wall.
5. If present, press the tab on the card retention device that lays over the installed cards and lift it to gain full access to the card.
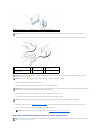
6. Press the release tab (if present) on the system board connector as you grasp the card by its top corners, and then ease the card out of the connector.
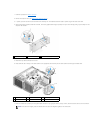
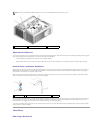
7. Install a filler bracket in the empty card-slot opening. If you are replacing the card, see Installing PCI and PCI Express Cards.
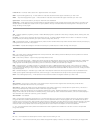
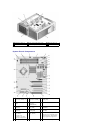
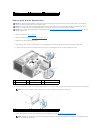
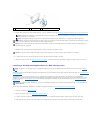
1
PCI card
2
PCI Express x16 card
3
PCI Express x16 card slot
4
PCI Express x1 card slot
5
PCI Express x1 card
NOTICE: To avoid electrostatic discharge and damage to internal components, ground yourself by using a wrist grounding strap or by periodically
touching an unpainted metal surface on the computer chassis.
NOTICE: If your computer came with a PCI graphics card installed, removal of the card is not necessary when installing additional graphics cards;
however, the card is required for troubleshooting purposes. If you remove the card, store it in a safe and secure location.
NOTICE: If you have the optional dual graphics card configuration, see Removing a PCI Express Graphics Card from a Dual Configuration to remove or
replace a graphics card.
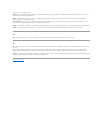
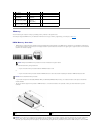
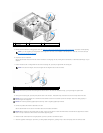
1
release tab
2
card retainer
3
alignment guide
4
fan bracket
NOTE: If the card is full length, press the release tab on the end of the alignment guides on the fan bracket.
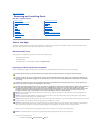
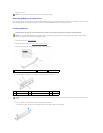
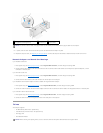
1
PCI Express x16 card
2
securing tab
3
PCI Express x16 card slot
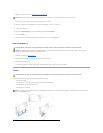
NOTE: Installing filler brackets over empty card-slot openings is necessary to maintain FCC certification of the computer. The brackets also keep
dust and dirt out of your computer.