


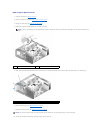
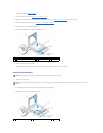
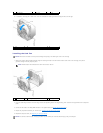

6. In succession, carefully pull on each corner of the fan to detach the rubber grommets securing the fan to the fan cage.
Installing the Card Fan
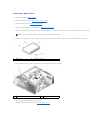
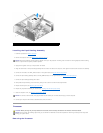
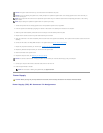
1. With the fan power cable oriented downward, align the rubber grommets in the fan with the holes in each corner of the fan cage, then pull the
grommets through until they snap into place.
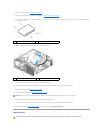
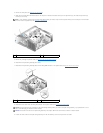
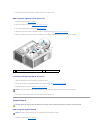
2. Insert the tabs along the bottom of the fan cage into the corresponding slots on the cage housing, then rotate the fan cage forward until it snaps into
place.
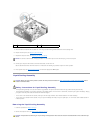
3. Connect the fan cable to the FAN_CAGE connector on the system board (see System Board Components).
4. Replace any expansion cards that you removed (see Installing PCI and PCI Express Cards).
5. Replace the computer cover (see Replacing the Computer Cover).
1
cage housing
2
fan cage
3
tab (2)
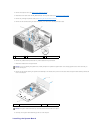
1
card fan
2
rubber grommet (4)
3
fan cage
NOTICE: Ensure the fan cable is correctly routed through the opening in the lower-right corner of the fan cage.
NOTE: Airflow direction and orientation are shown on the side of the fan.
1
card fan
2
rubber grommet (4)
3
fan cage
NOTICE: To connect a network cable, first plug the cable into the network port or device and then plug it into your computer.