


3. Remove the drive panel (see Removing the Drive Panel).
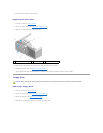
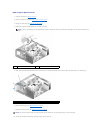
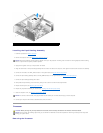
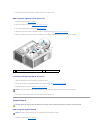
4. Slide the drive release latch towards the base of the computer to release the shoulder screw(s) on the optical drive(s), then slide the optical drive(s)
forward, out of the way.
5. Remove any full-length expansion cards (see Removing PCI and PCI Express Cards).
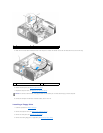
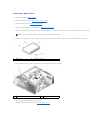
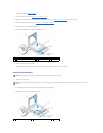
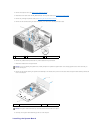
6. Disconnect the liquid cooling assembly power cable.
7. Disconnect the liquid cooling assembly cable from the TEC_PUMP connector on the system board (see System Board Components).
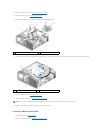
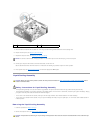
8. Disconnect the fan cable from the FAN1_CPU connector on the system board (see System Board Components).
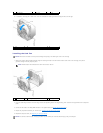
9. Loosen the seven screws on the liquid cooling assembly, then lift the assembly out of the computer and set it aside.
NOTE: It is not necessary to disconnect the optical drive cables unless you intend to fully remove the optical drive(s) from the computer. For information
on how to remove an optical drive, see Removing an Optical Drive.
1
drive release latch
2
optical drive
1
power cable
2
TEC_PUMP
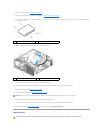
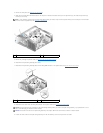
NOTICE: The processor heat sink is attached to the liquid cooling assembly. When you remove the liquid cooling assembly, lay it upside down or on its
side to avoid damaging the heatsink thermal interface.
NOTICE: The screw at the front of the liquid cooling assembly is not captive. Remove the screw and set it aside in a secure location.