


Configuring Port and System Security 569
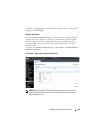
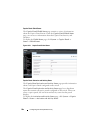
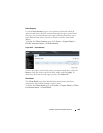
Creating and Configuring a Captive Portal
Beginning in Privileged EXEC mode, use the following commands to create a
Captive Portal instance and configure its settings.
CTRL + Z Exit to Privileged EXEC mode.
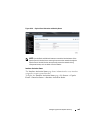
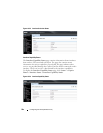
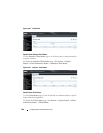
show captive-portal
[status]
View the Captive Portal administrative and operational
status. Use the status keyword to view additional global
Captive Portal information and summary information
about all configured Captive Portal instances.
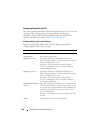
Command Purpose
configure Enter global configuration mode.
captive-portal Enter Captive Portal mode.
configuration
cp-id
Enter the captive portal instance mode
cp-id
— The Captive Portal instance (Range: 1–10). The
Captive Portal configuration identified by CP ID 1 is the
default CP configuration.
name
string
Add a name to the Captive Portal instance.
string
— CP configuration name (Range: 1–32 characters).
protocol {http | https} Specify whether to use HTTP or HTTPs during the
Captive Portal user verification process.
verification {guest |
local | radius}
Specify how to process user credentials the user enters on
the verification page.
• guest — Allows access for unauthenticated users (users
that do not have assigned user names and passwords).
• local — Authenticates users against a local user database.
• radius — Authenticates users against a remote RADIUS
database.
radius-auth-server
name
Specify the name of the RADIUS server to use for
RADIUS verification. Use the commands described in
"Using RADIUS Servers to Control Management Access"
on page 232 to configure RADIUS server settings for the
switch.
Command Purpose