Removing and Installing Parts 95
NOTICE: To connect a network cable, first plug the cable in to the network wall jack and then plug the
cable in to the computer.
9
Connect your computer and devices to electrical outlets, and turn them on.
See the documentation that came with the hard drive for instructions about installing any
software required for the operation of the hard drive.
Adding a Second Hard Drive
CAUTION: Before you begin any of the procedures in this section, follow the safety instructions in the
Product Information Guide.
CAUTION: To guard against electrical shock, always unplug your computer from the electrical outlet
before opening the cover.
NOTICE: To avoid damage to the drive, do not set it on a hard surface. Instead, set the drive on a
surface, such as a foam pad, that will sufficiently cushion it.
1
Check the documentation for the drive to verify that it is configured for your computer.
2
Follow the procedures in "Before You Begin" on page 63.
3
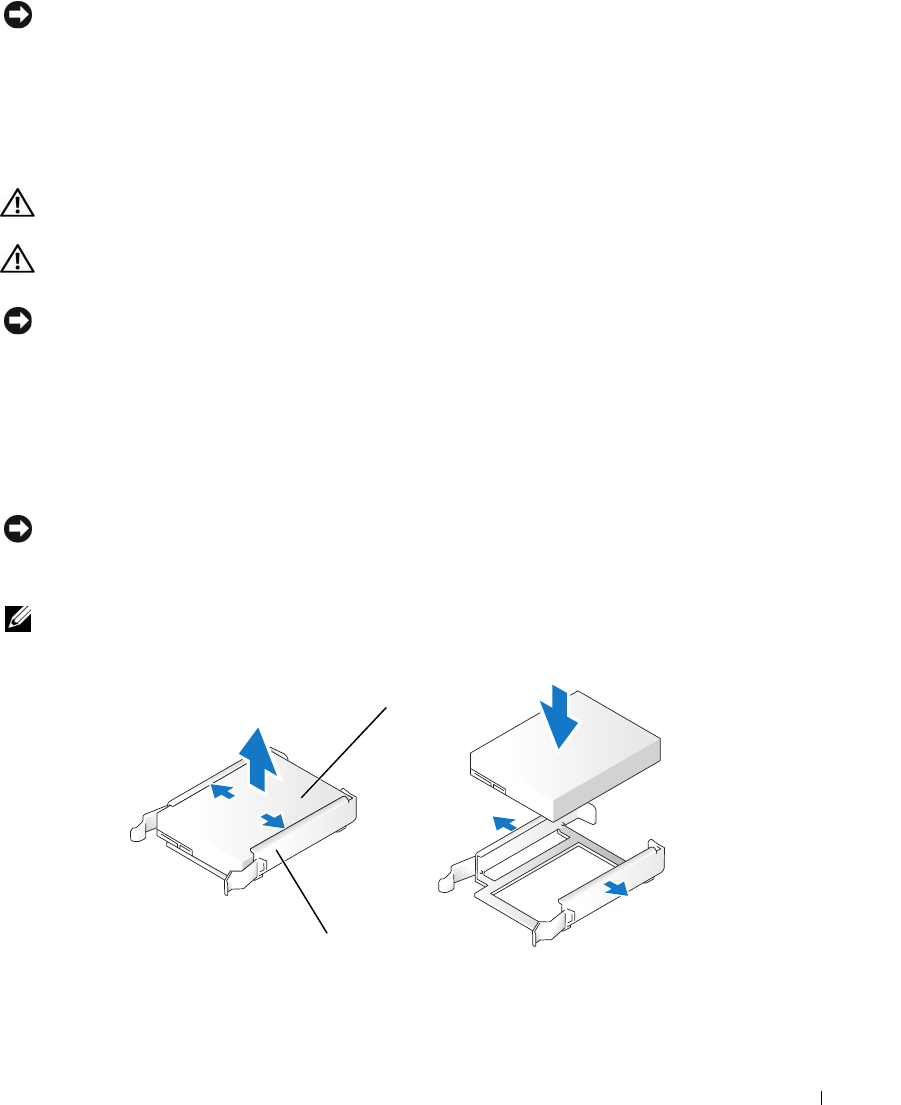
Press in on the tabs on each side of the hard drive bracket in the empty drive bay and slide the
bracket up and out.
4
Snap the hard drive bracket onto the new hard drive.
NOTICE: Do not install any drive into the lower hard-drive bay until you have removed the hard drive
bracket from the inside of the hard drive bay.
5
Slide the new hard drive into empty bay until you feel a click.
NOTE: If your replacement hard drive does not have the hard drive bracket attached, remove the bracket
from the old hard drive by unsnapping it from the drive. Snap the bracket onto the new hard drive.
6
Gently slide the drive into place until you feel a click or feel the drive securely installed.
7
Connect the power and hard drive cables to the drive.
hard drive
hard drive bracket
