15
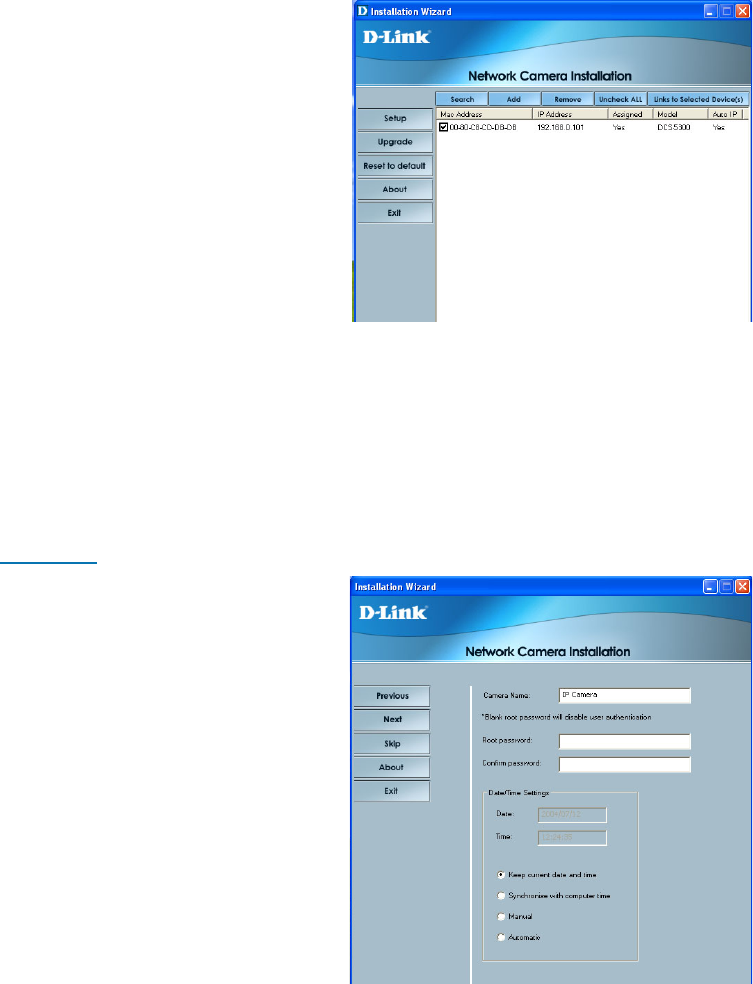
Installation Wizard Screen
The following options are available on the Installation Wizard screen by clicking
on the corresponding tab:
Search -
Click to search for any available
cameras to connect to the network.
Add -
Click to manually add a camera to
the network. A window will appear,
prompting you to enter the camera’s
IP address or domain name. A
second window will appear,
prompting you to enter the port
number.
Remove -
Click to remove the selected camera(s) from the network.
Uncheck All -
Click to uncheck all selected cameras.
Links to Selected Devices -
Click to link all selected devices to the network.
Setup -
On the initial Setup Screen you can
configure System and Date/Time
settings for each camera. Click
Next to configure Network settings
for the camera.
System Settings -
Enter a Camera Name and create
a Root password for the camera.
Date/Time Settings -
Enter the Date and Time for each
camera. These settings can also be
configured on the Tools > System
screen (page 50) when configuring
the camera via a Web browser.


