


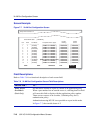
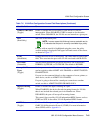


VLAN Classification Configuration Screen
802.1Q VLAN Configuration Menu Screens 7-21
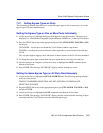
5. Use the arrow keys to highlight the port’s Acceptable Frame Types field.
6. Press the SPACE bar to toggle the field to the correct setting: ADMIT ALL FRAMES or
ADMIT TAGGED FRAMES ONLY.
7. Use the arrow keys to highlight the port’s Ingress Filtering field.
8. Press the SPACE bar to toggle the field to the correct setting: ENABLED or DISABLED. This
will either enable or disable the filtering set in the Acceptable Frame Type field in step 5.
9. Use the arrow keys to highlight the port’s GVRP Status field.
10.Press the SPACE bar to toggle the field to the correct setting: ENABLED or DISABLED.
11.To configure more than one port, repeat step 1 through step 10. Then go to step 12 to save your
settings.
12.Use the arrow keys to highlight the SAVE command at the bottom of the screen.
13.Press ENTER. The message “SAVED OK” displays and all settings are saved.
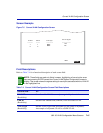
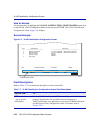
7.8 VLAN CLASSIFICATION CONFIGURATION SCREEN
When to Use
To perform the following:
• Display the VLAN ID (VID), Protocol Classification, and Description of each classification of
the current entries.
• Assign VLANs according to Classification rules.
• Add/delete a VID and associated classification entry.
• Access the Protocol Port Configuration screen.
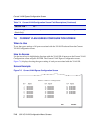
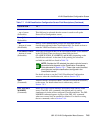
When a frame is received that already contains an 802.1Q frame tag, frame classification is not
implemented. Instead, the frame is processed by the SmartSwitch device according to the
information contained in the 802.1Q frame tag. When the frame is transmitted, it is sent to the
ports associated with the VLAN as established using the Protocol Port Configuration screen
described in Section 7.9.